Do you want to know how to install WordPress on Hostinger? Here I’m going to show you how easy it is to get it installed and have your WordPress site launched in just a matter of minutes.
Hostinger is one of the cheapest hosting providers out there, offering fantastic prices without compromising on superb features, reliable uptime, and page loading speeds that are faster than the industry average.
- 30-day hassle-free money-back guarantee
- Unlimited SSD disk space & bandwidth
- A free domain name (except on the entry-level plan)
- Free daily & weekly data backups
- Free SSL certificate & Bitninja security on all plans
- Solid uptime and super-fast server response times thanks to LiteSpeed
- 1-click WordPress auto-installer
If you have read my Hostinger review then you know this is a LiteSpeed-powered, CHEAP, and beginner-friendly web host that I recommend.
One reason I love Hostinger (apart from the cheap price) is their use of LiteSpeed. It’s a server technology that is guaranteed to boost your WordPress website’s performance, speed, and security. Learn more about LiteSpeed hosting here.
The process of installing WordPress on Hostinger is very easy. Here below are the steps you need to go through to install WordPress on Hostinger.
Step 1. Select Your Hostinger Plan
First, you need to pick a web hosting plan. Go and check out my step-by-step Hostinger sign-up guide here for how to do that.
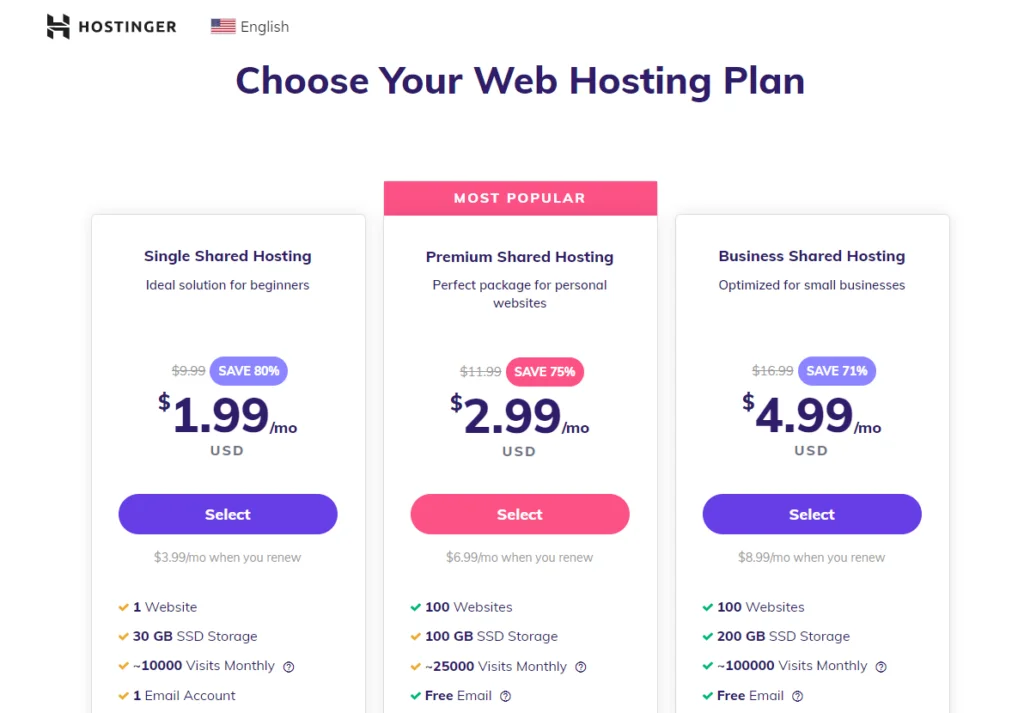
I recommend the Hostinger Business Shared Hosting plan, as it’s the plan that will give you the best features (as I’ve explained here).
I recommend the Business Shared Hosting plan, because;
it comes with better performance, speed, and security – plus it comes with more features such as a free domain, daily backups, Cloudflare integration + more.
Get 75% OFF Hostinger's plans
From $2.99 per month
Step 2. Installing WordPress on Your Hostinger Account
In your order confirmation email, you received after you’ve signed up, there you’ll find your login details.
Now, log in to your Hostinger control panel.
Once you are logged in, click Hosting on the main menu.
Then select the domain name you want to install WordPress for, and click the Manage button to access your hPanel.
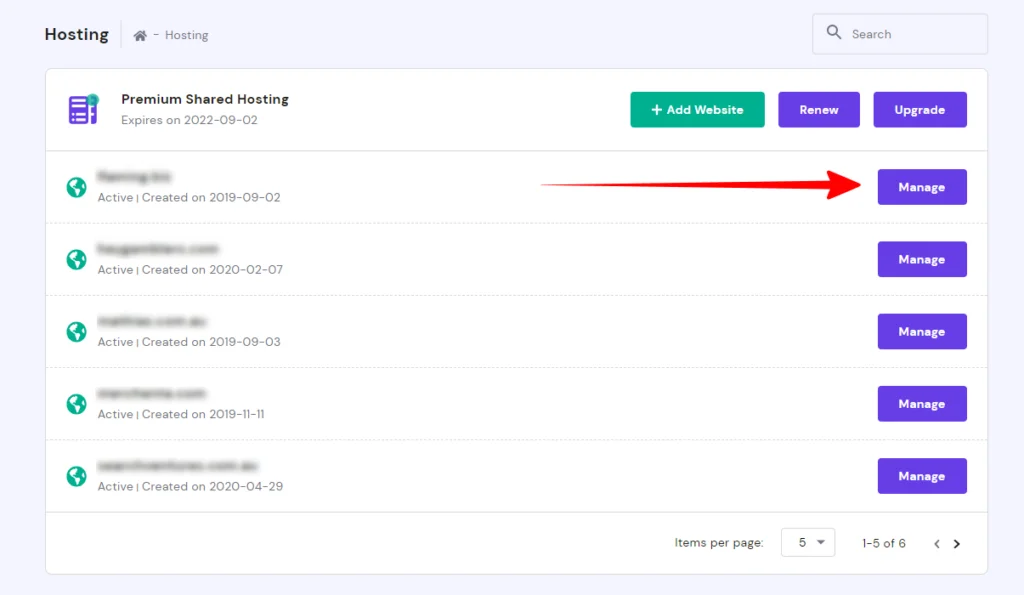
Step 3 – Hostinger WordPress Auto-Installer
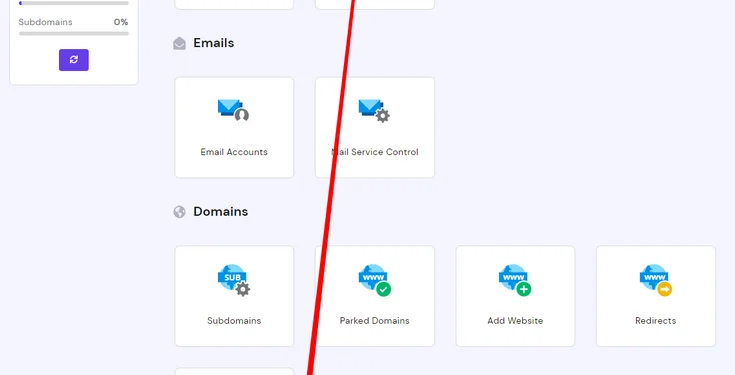
Scroll down the page a bit and locate the Auto Installer option under the Website section.
Select WordPress (the most popular option shown) and click continue.
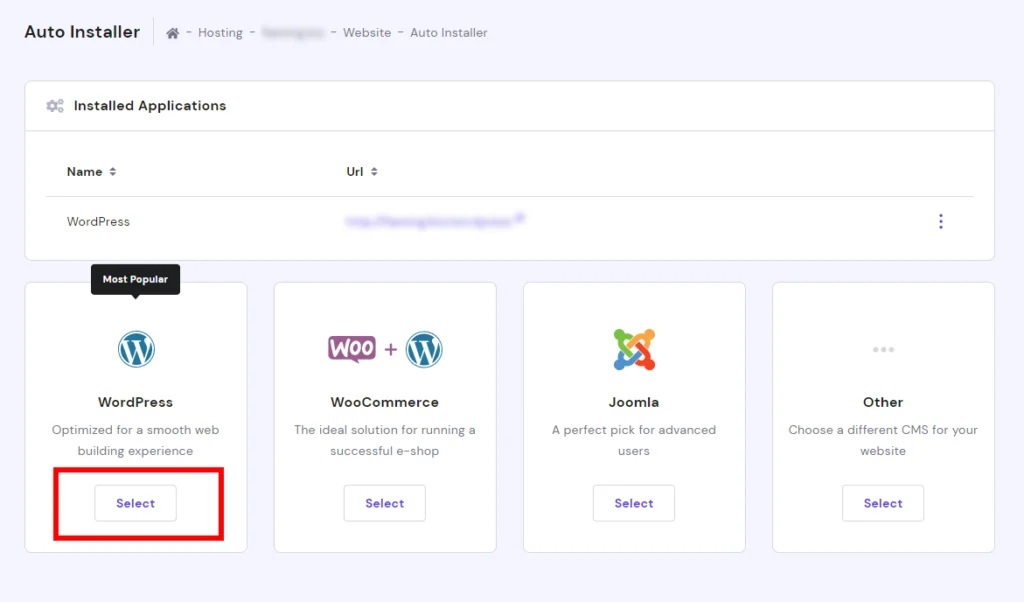
Step 4 – Fill Out WordPress Details
Next, you need to fill out a simple WordPress form.
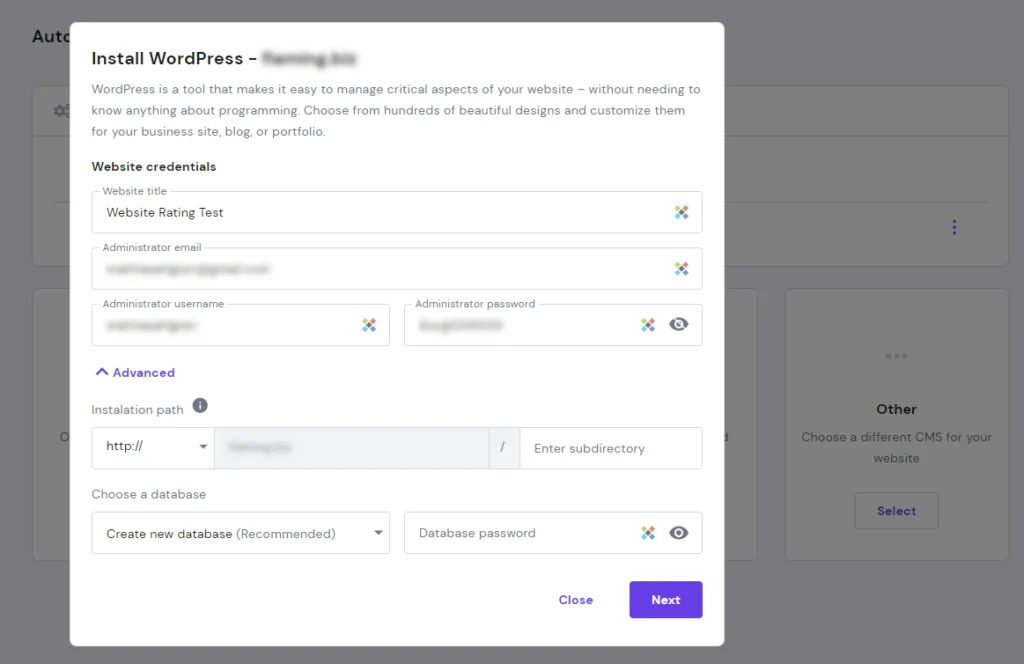
Choose a website title (You can always change this later), and set up an administrator username, password, and email address for logging into your WordPress dashboard later.
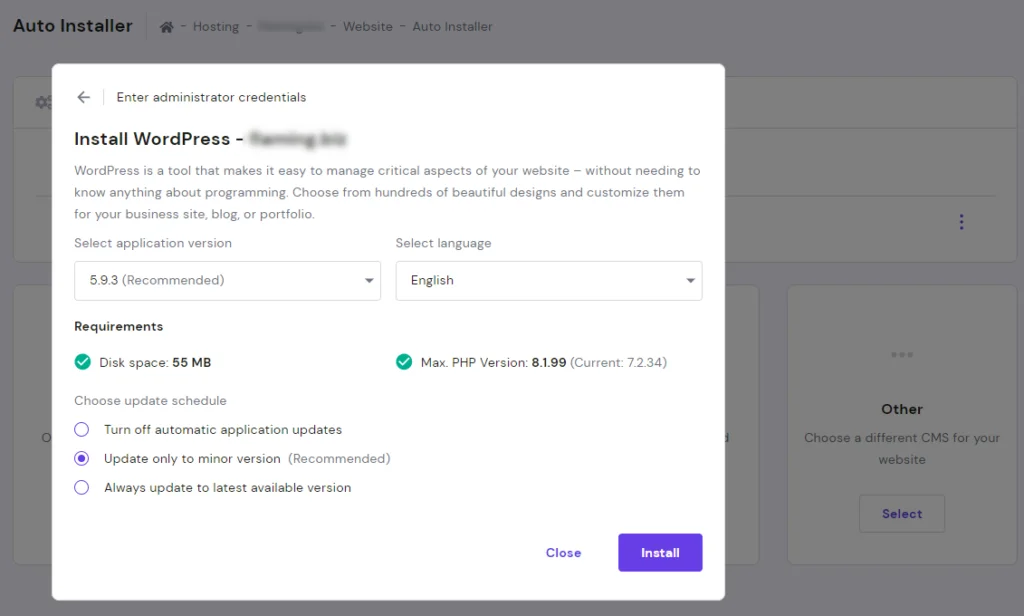
On the next screen, select a relevant language and opt-in to update to only to minor version for automatic updates.
Next, click the “install” button, and WordPress begins to install!
Step 5 – That’s it! You have successfully installed WordPress!
You did it! You now have a brand-new installation of WordPress on your Hostinger web hosting account.
You will also receive an email with the WordPress login link once WordPress is successfully installed on your server.
Simply click on that link to login into your WordPress dashboard and begin editing themes, uploading plugins, and adding content to start blogging on your new WordPress website.
If you haven’t already, go to Hostinger.com and sign up right now.
Step 6 – Manage Your Hostinger WordPress Site
Your newly installed WordPress site on Hostinger can be further customized.
Head back to the Hosting overview page, in the WordPress section click on “Dashboard”.
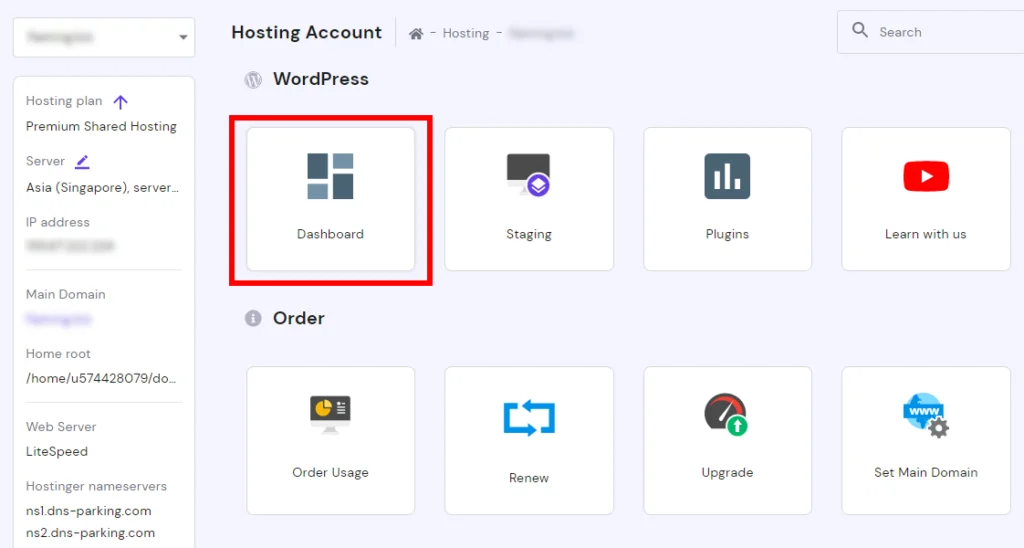
From here you can further customize your WordPress installation.
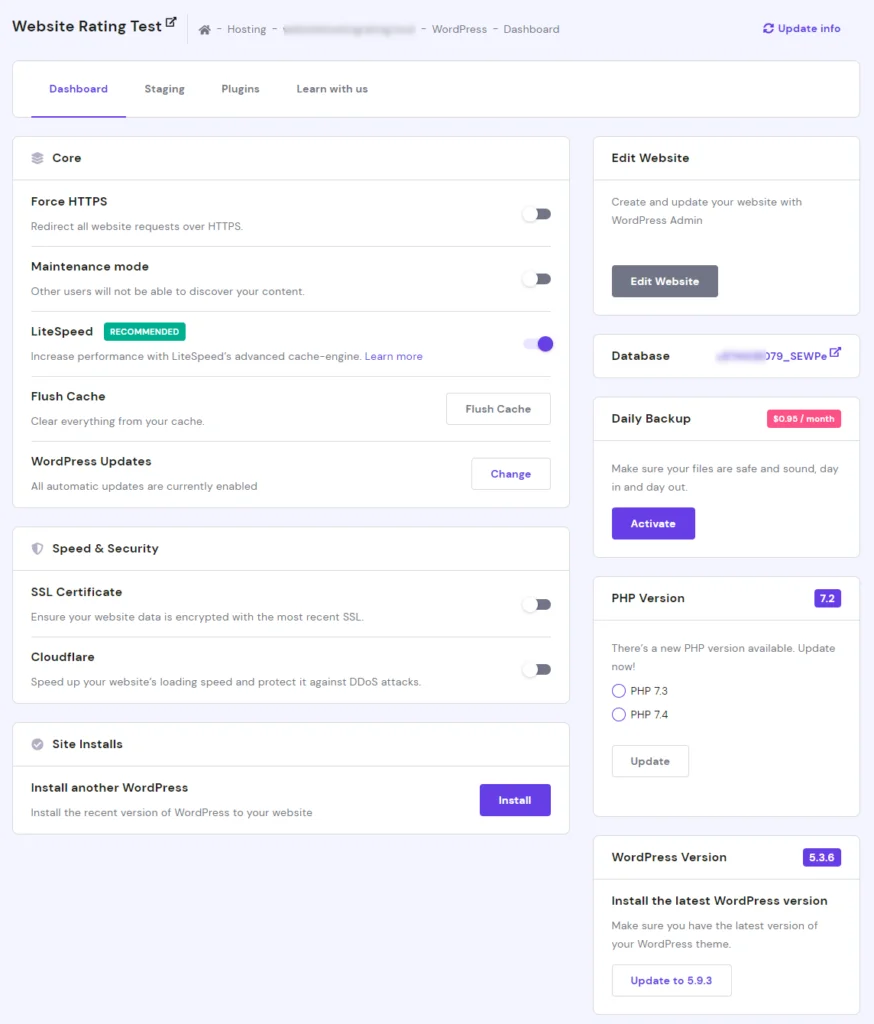
Here you can configure your WordPress site’s performance, speed, and security:
- Force HTTPS
- Enable Maintenance Mode
- LiteSpeed (preinstalled and pre-configured to give your site a speed boost)
- Flush cache
- Change WordPress updates
- Install SSL certificate (here’s how to do this on Hostinger)
- Configure Cloudflare – DNS, DDoS protection, and more
- Change PHP version
- Edit website (direct access to your WordPress dashboard)
- Enable daily backups (possible paid add-on depending on the plan you signed up for)
- 2nd tab – Staging environment (paid add-on)
- 3rd tab – Plugins (from here you can install and manage popular WordPress plugins)
Get 75% OFF Hostinger's plans
From $2.99 per month
