HostGator is a leading web hosting provider known for its fast growth and popularity. This guide will walk you through the step-by-step process of signing up for HostGator’s Hatchling plan.
HostGator is a beginner-friendly web host (see my recent review of HostGator here) that offers feature-rich and cheap web hosting services.
- You get lots of features; like SSD storage, free website migration, free website backups, free CDN, free Let’s Encrypt SSL certificate + more.
- You get a free domain name for one year.
- Lots of storage: All plans come with unlimited storage.
- Flexible terms: Hosting plans can be purchased on a 1, 3, 6, 12, 24, or 36-month basis, paying with a credit card or PayPal AND a 45-day money-back guarantee.
- You get WordPress pre-installed or you can easily install WordPress yourself.
The process of signing up with HostGator is very straightforward. Here are the steps you need to go through to sign up with HostGator.
Step 1. Visit HostGator’s official website

Go to their official website and scroll down to see the hosting plans page (you can’t miss it).
Step 2. Choose your web hosting plan
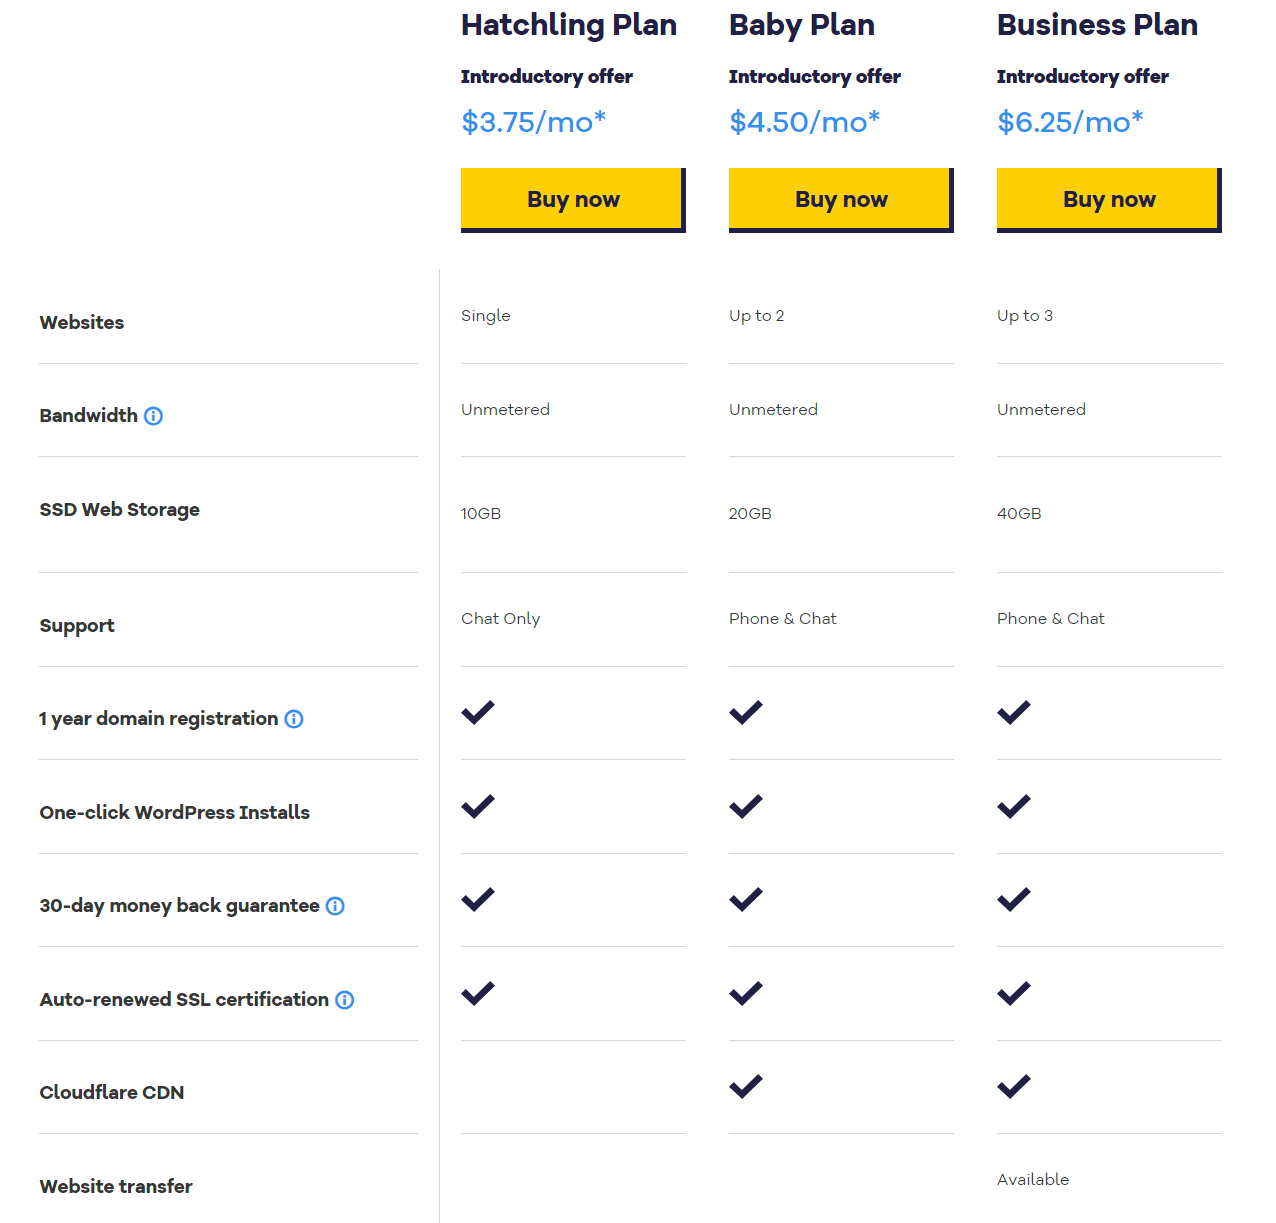
HostGator has three web hosting pricing plans you can sign up for; Hatchling, Baby, and Business. I recommend the Hatchling plan (the most beginner-friendly and cheapest!)
The main difference between the plans are:
- Hatchling plan: host 1 website.
- Baby plan: Everything in Hatchling + host unlimited websites.
- Business plan: Everything in Hatchling & Baby + a free Positive SSL certificate, a dedicated IP address, and included SEO tools.
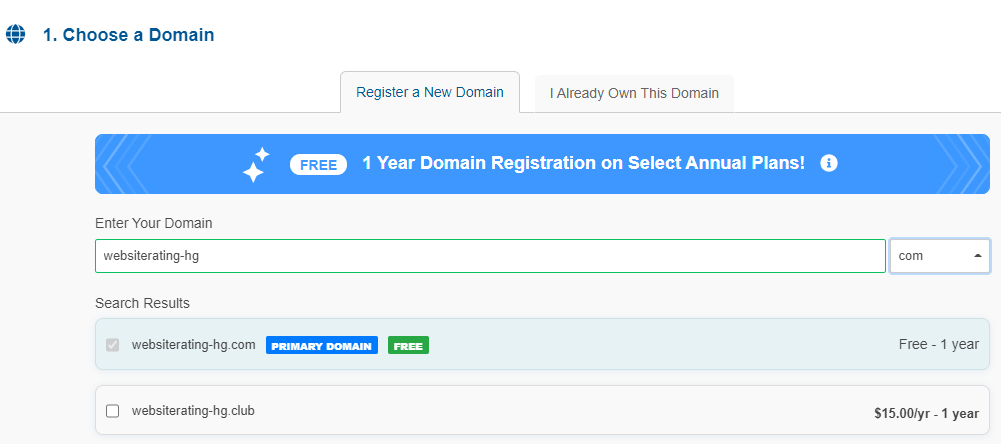
Step 3. Choose Domain Name
Next, you are asked to choose a domain name.
You can either register a new domain or sign up using an existing domain you own.
Step 4. Choose package & billing cycle
Choose your hosting package type and billing cycle. The discounted prices only apply on the first invoice, so you’ll get the most savings on longer billing cycles.)

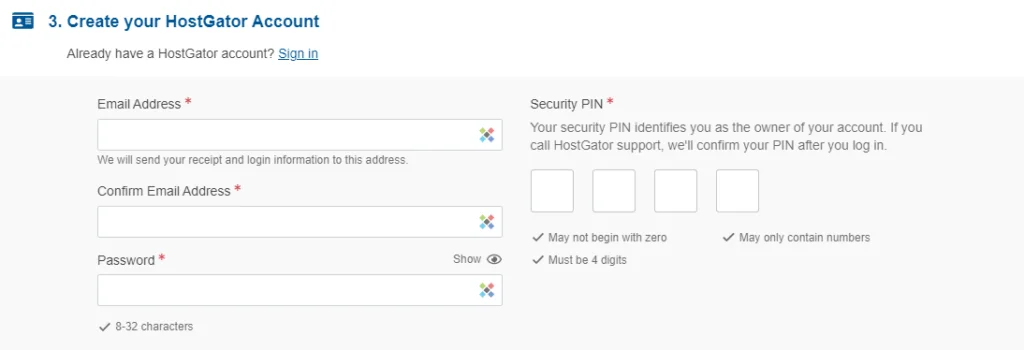
Step 5. Create an account
Next, you are asked to create the login for your HostGator account. Fill out the required fields – email address, password, and Security PIN.
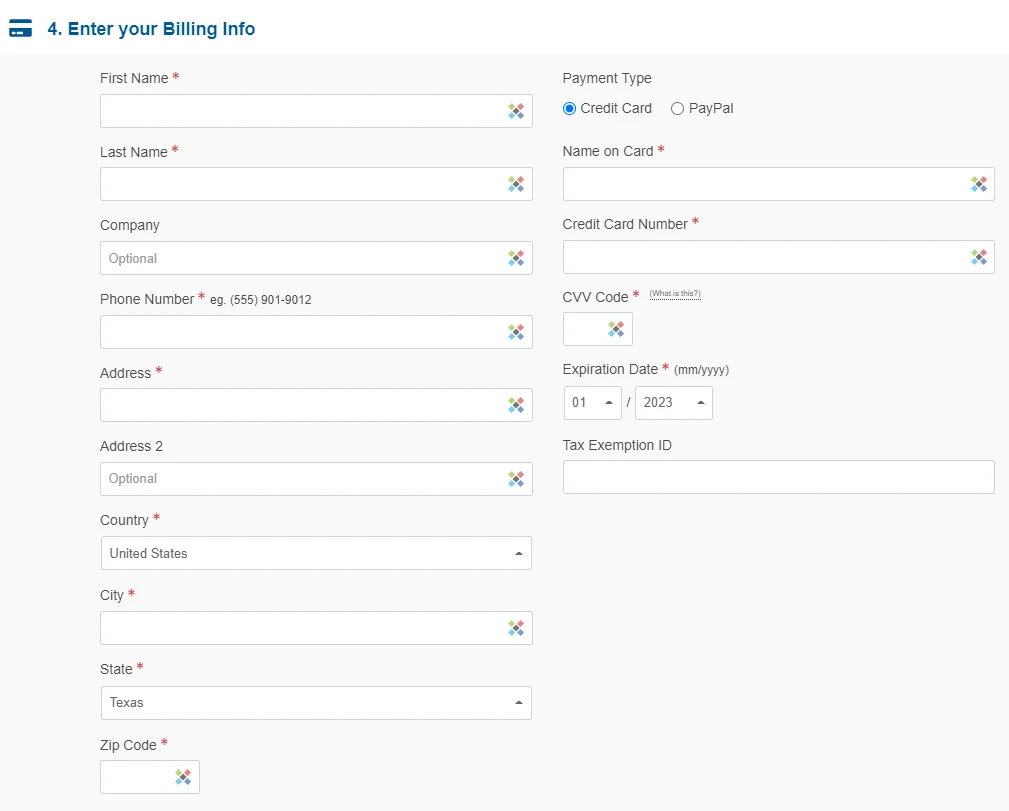
Step 6. Billing information
This is is the standard stuff that you have done a million times before; first and last name, address country, phone number, etc. followed by payment information (credit card or PayPal).
Step 7. HostGator extras (paid addons)
Here, HostGator upsells additional services and features. I recommend that you de-select HostGator’s additional services (you don’t need them).
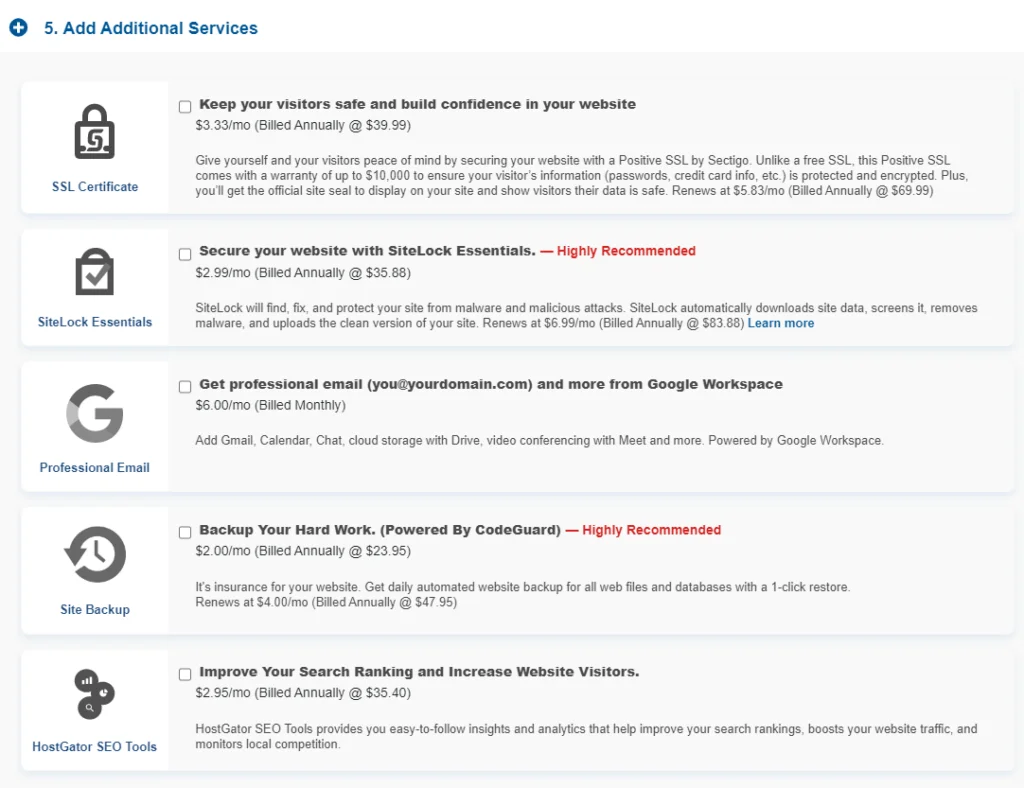
Step 8. Apply HostGator coupon code
You don’t want to miss this to save a lot of money. Make sure that the coupon code WSHR is applied, as it gives you 61% off the total price (saving you up to $170).

Step 9. Review your order
The final step of HostGator’s sign-up process is for you to review your order details and check your total amount due.
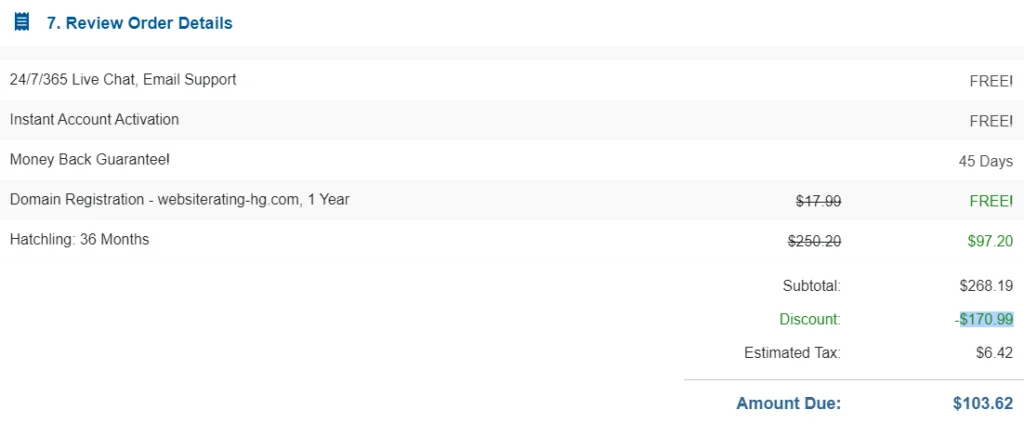
Final step. And you are ALL done!
Congratulations! You’ve successfully signed up with HostGator! Check your email for a welcome message containing your login credentials to the HostGator Customer Porta
Wrap Up
The signup process with HostGator is quick and straightforward. Once you choose your plan and enter your personal and payment information, your hosting account will be activated in minutes
After your payment has been processed, you will be able to access your hosting account and begin setting up your website by installing WordPress on HostGator.
If you haven’t already, go to HostGator.com and sign up today!
Recent Improvements & Updates
HostGator constantly improves its hosting services with additional features. HostGator has introduced several updates and improvements to its services and hosting products recently (last checked October 2024):
- Easier Customer Portal: They’ve redesigned their customer portal to make it easier for you to handle your account. Now, you can quickly change your contact details or how you want to handle your billing.
- Faster Website Loading: HostGator has teamed up with Cloudflare CDN, which means your website can load faster for visitors around the world. This is because Cloudflare has servers globally that keep a copy of your site, so it loads quickly no matter where someone is accessing it from.
- Website Builder: The Gator Website Builder from HostGator uses AI to assist users in creating websites, making the process simpler, especially for those with limited technical skills. This tool allows for easy setup of blogs or e-commerce stores as part of the site.
- User Interface and Experience: HostGator uses the popular cPanel for its control panel, known for its ease of use, making it a good choice for both beginners and experienced users. The user interface is intuitive, simplifying tasks like managing files, databases, and email accounts.
- Security Features: HostGator’s hosting services include various security features such as free SSL certificates, automatic backups, malware scanning and removal, and DDoS protection. These features enhance the security and reliability of websites hosted on their platform.
Reviewing HostGator: Our Methodology
When we review web hosts, our testing and evaluation are based on these criteria:
- Value for Money: What types of web hosting plans are on offer, and are they good value for money?
- User Friendliness: How user-friendly is the signup process, the onboarding, the dashboard? and so on.
- Customer Support: When we need help, how quickly can we get it, and is the support effective and helpful?
- Hosting Features: What unique features does the web host provide, and how do they stack up against competitors?
- Security: Are essential security measures like SSL certificates, DDoS protection, backup services, and malware/virus scans included?
- Speed and Uptime: Is the hosting service fast and reliable? What types of servers do they use, and how do they perform in tests?
For more details on our review process, click here.

