You have done your research about web hosting services and thinking of signing up with A2 Hosting. Good choice, but perhaps you don’t know where to start?
Here’s my easy-to-follow tutorial showing you how to sign up with A2 Hosting, and I show you how to install WordPress on A2 Hosting.
This tutorial will help you take the first step towards hosting your website with A2 Hosting.
A2 Hosting is independently owned meaning they are in complete control of all of their servers, which is a huge plus in the monopoly of hosting providers out there.
They also go big on the three most important hosting features – speed, features, and support. If you want more info then you should check out my A2 Hosting review here.
Signing up with A2 Hosting is very straightforward and easy to do, and installing WordPress on A2 Hosting couldn’t be easier.
Let me show you how…
How To Sign Up With A2 Hosting
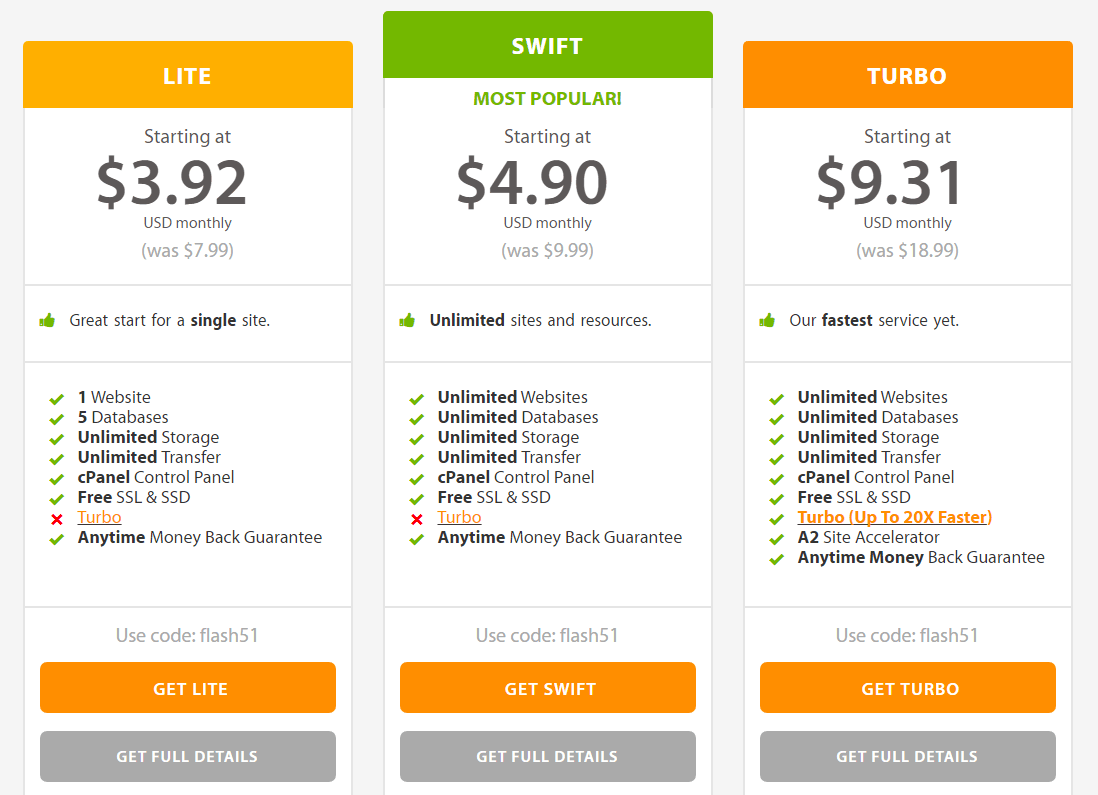
Step 1. Choose your A2 Hosting plan
Visit www.a2hosting.com and choose the plan you want to use. (I recommend the Turbo plan, it is the most expensive shared plan they offer, but it will load your website really fast).
Step 2. Choose your domain name
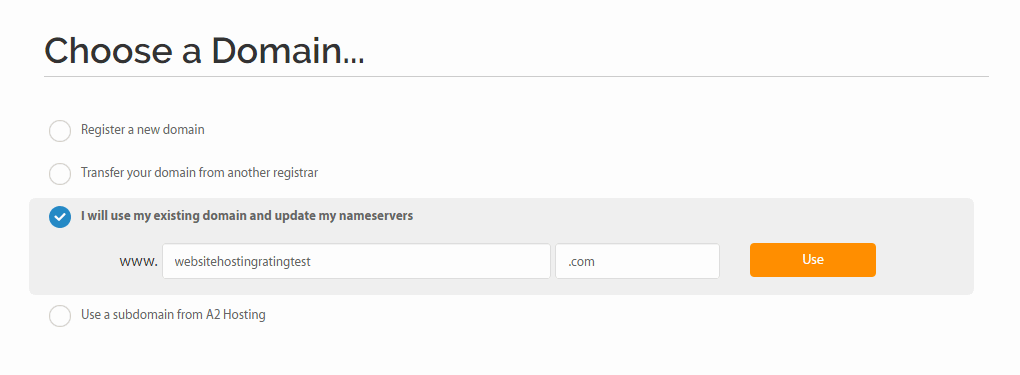
Next, you are asked to choose a domain. You can either register a brand new domain name with A2, or you can transfer your existing domain from another registrar to A2, or you can use your existing domain and update the nameservers.
Step 3. Configure the options of your plan
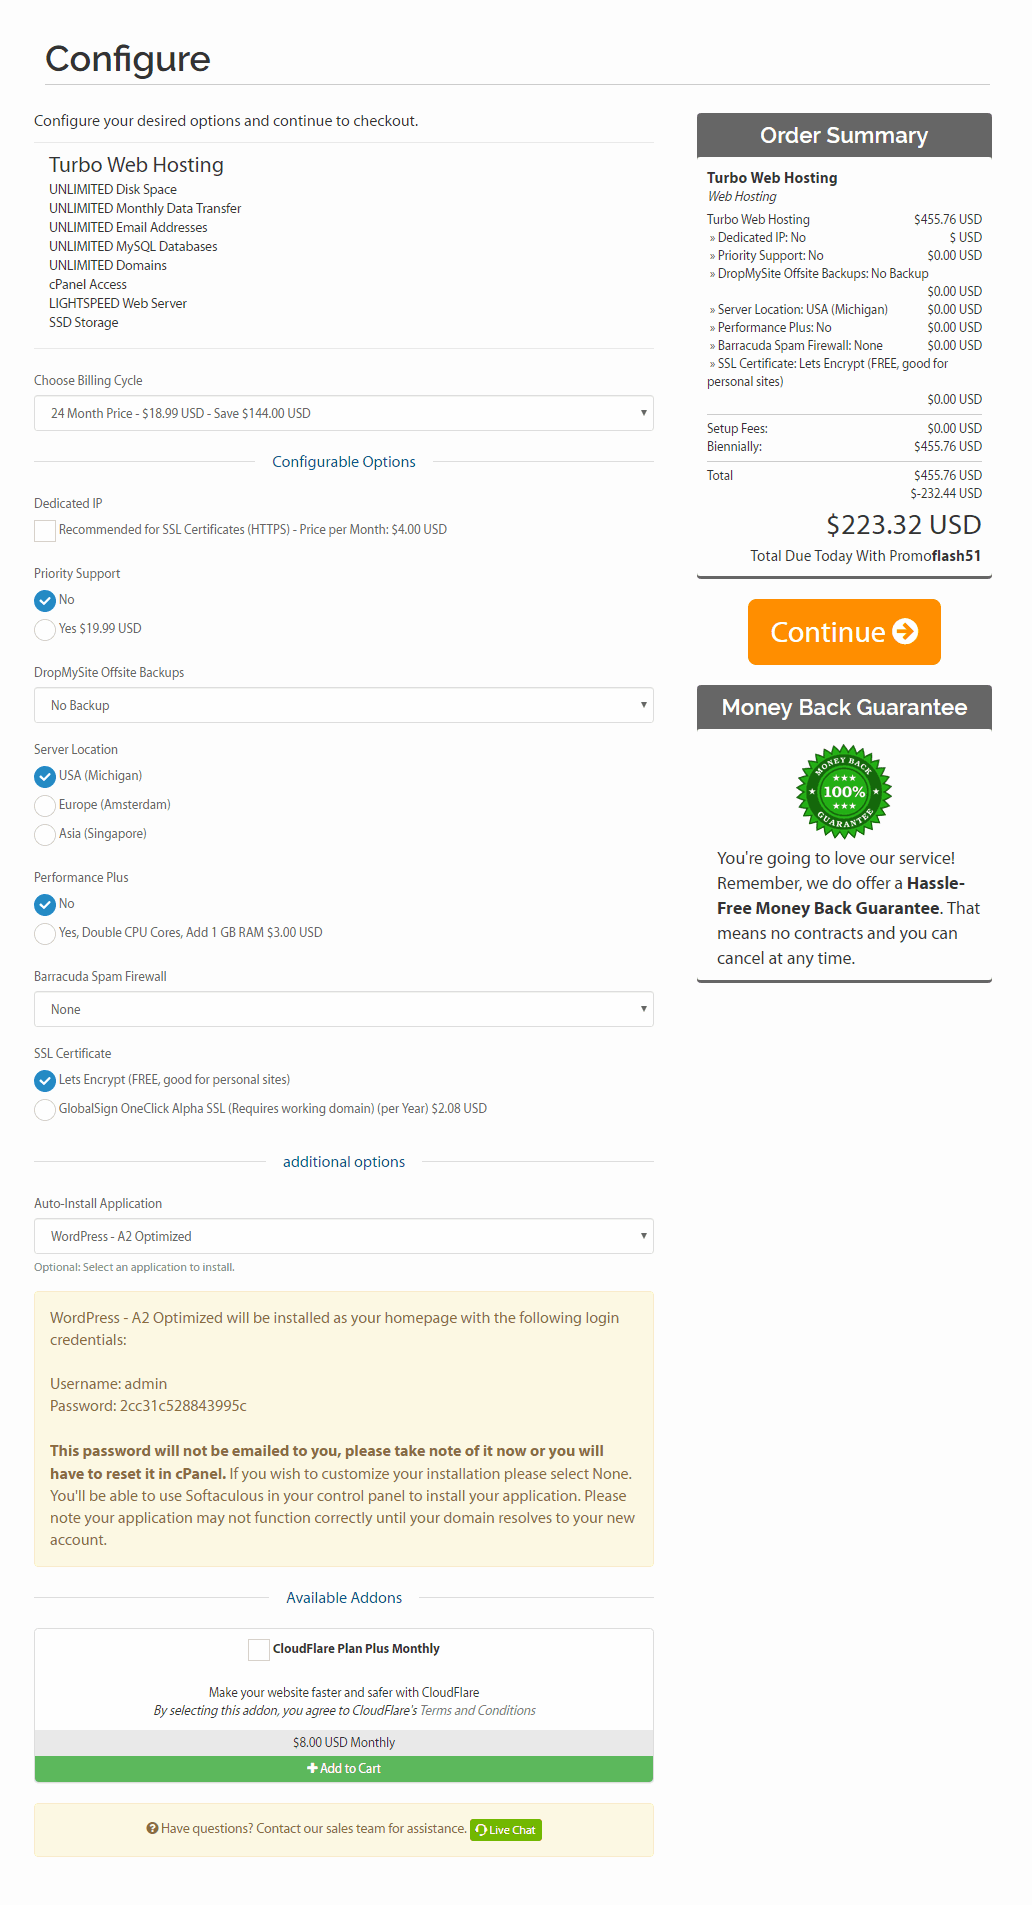
Here you are faced with a bunch of options you need to configure, plus paid extras (which you can always upgrade to later on).
- You get to choose your preferred billing cycle.
- Choose if you want a dedicated IP address (I don’t recommend it, unless you are created a Shopify ecommerce site and need a private SSL certificate).
- Priority support and DropMySite offsite backups are things that you don’t really need.
- You also get to choose your preferred server location (choose one that is the closest to you and your customers or site visitors).
- Performance Plus and Barracuda Spam Firewall are two other upgrades that you don’t really need.
- You get to choose an SSL certificate, Let’s Encrypt is free and a good choice for personal and small business sites.
- The next option is an important one. Here you can choose if you want A2 Hosting to auto-install WordPress (or Joomla, PrestaShop, plus loads more software) for you.
- The last option is CloudFlare plus, which is another upgrade you don’t need right now.
Click Continue.
Step 4. Review your details
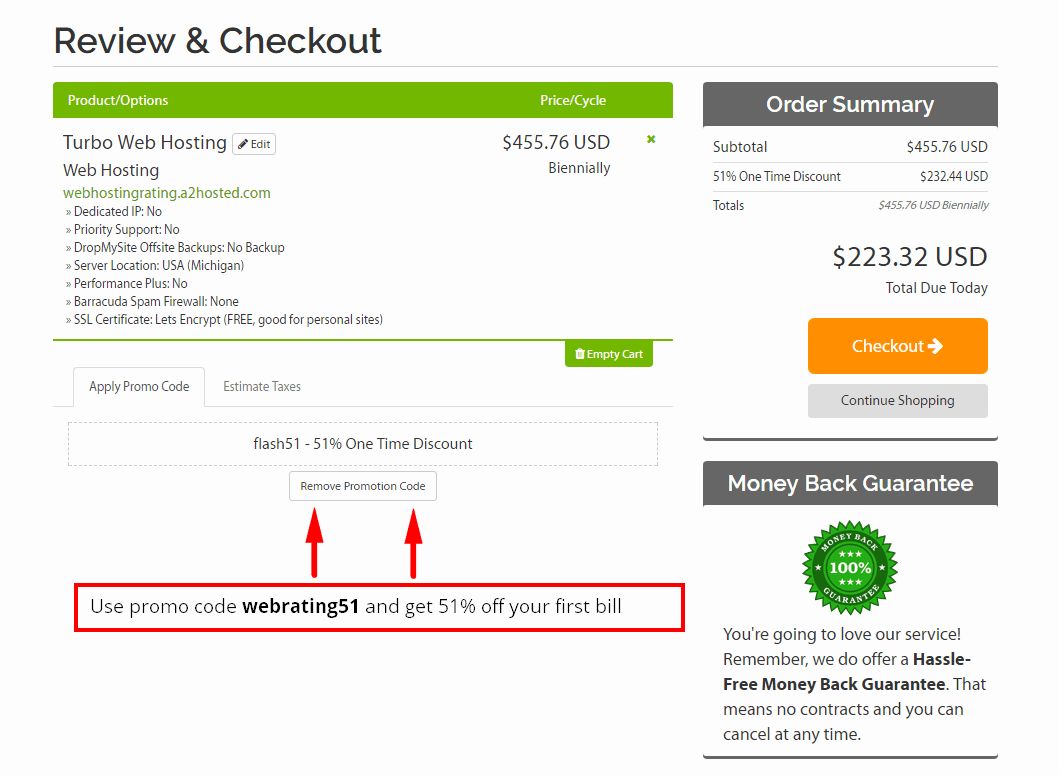
Double-check that everything is in order.
P.S.: Use promo code webrating51 to get 51% off your first bill
Step 5. Checkout
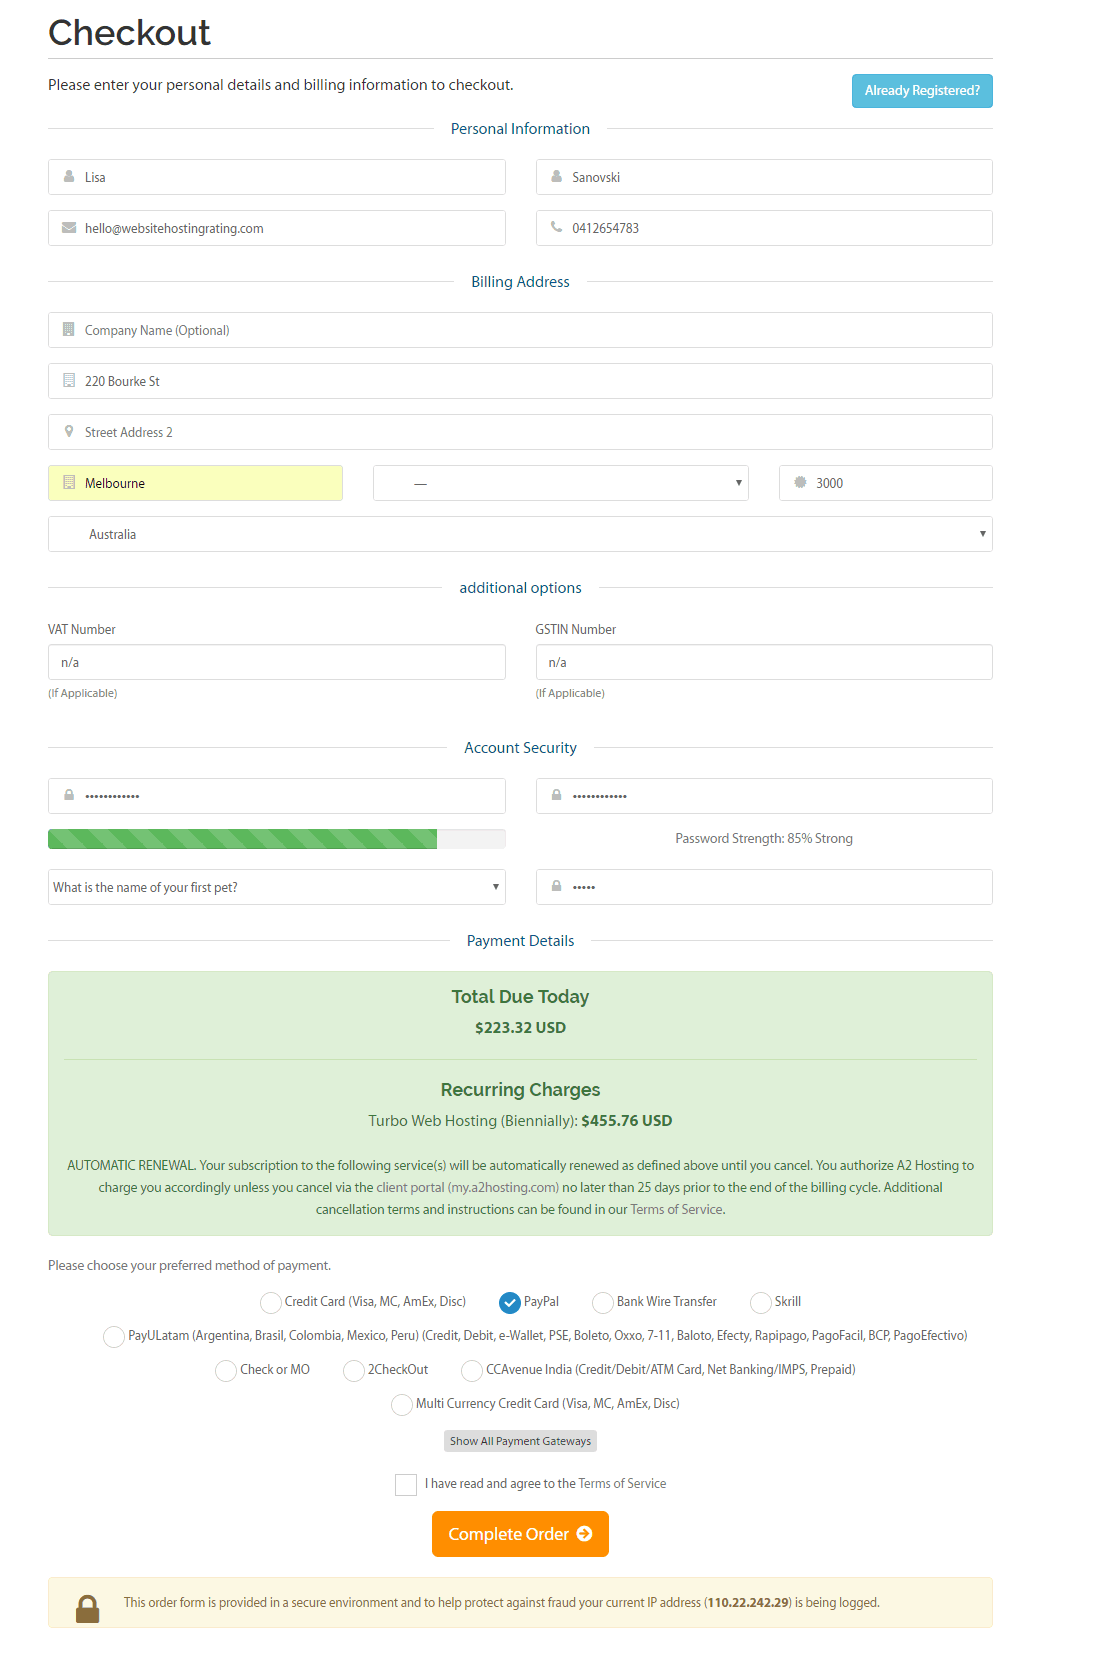
Fill out your personal information, billing address, an account password, and select your preferred payment method.
A2 Hosting accepts credit card payments (Visa, MasterCard, American Express, and Discover), Bank Wire Transfer, Skrill, 2CheckOut, and a range of other payment options.
Next, click on complete your order and your account will be set up.
Now head over to your email inbox and you will receive your order confirmation as well as a welcome email with all your login details.
How To Install WordPress On A2 Hosting
The absolute easiest way to install WordPress on A2 Hosting account is to choose to get WordPress pre-installed when you sign up with A2 Hosting and configure the options (which I explained here above).
However, you can also install WordPress after you have signed up with A2 Hosting by using an installation program called Softaculous.
How to install WordPress on A2 Hosting using Softaculous
- Step 1. Log into your A2 Hosting Control Panel (cPanel).
- Step 2. Click the WordPress A2 Optimized link, which is located in the Softaculous App Installer section.
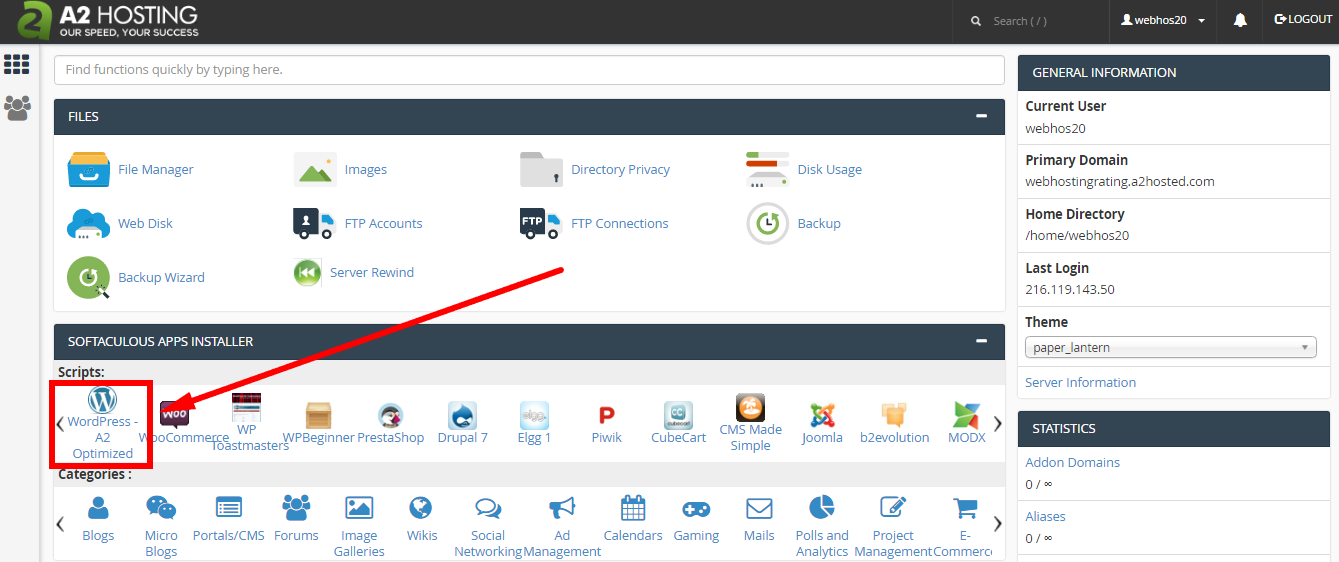
- Step 3. This will take you to the WordPress installation section
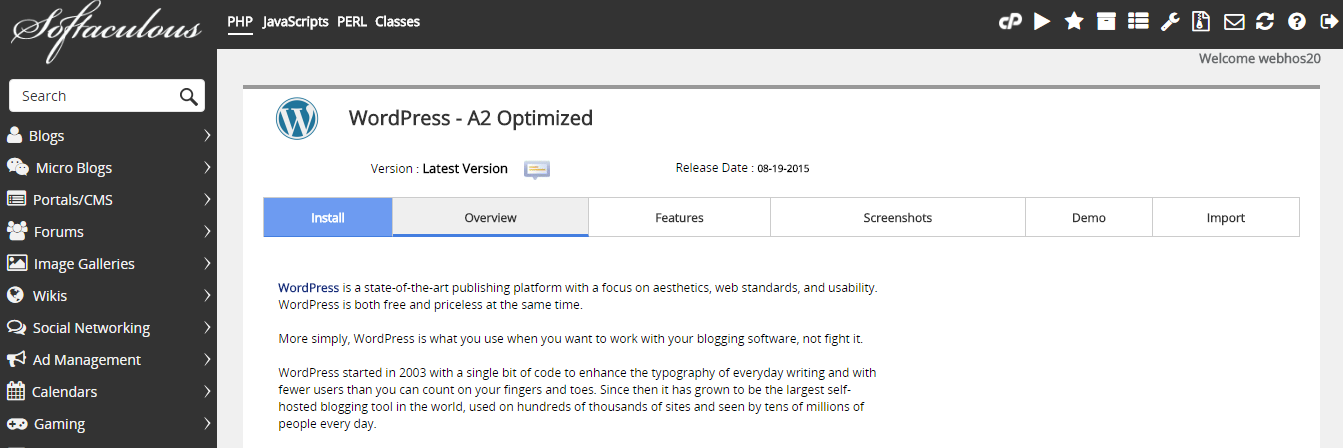
- Step 4. Click the Install button.
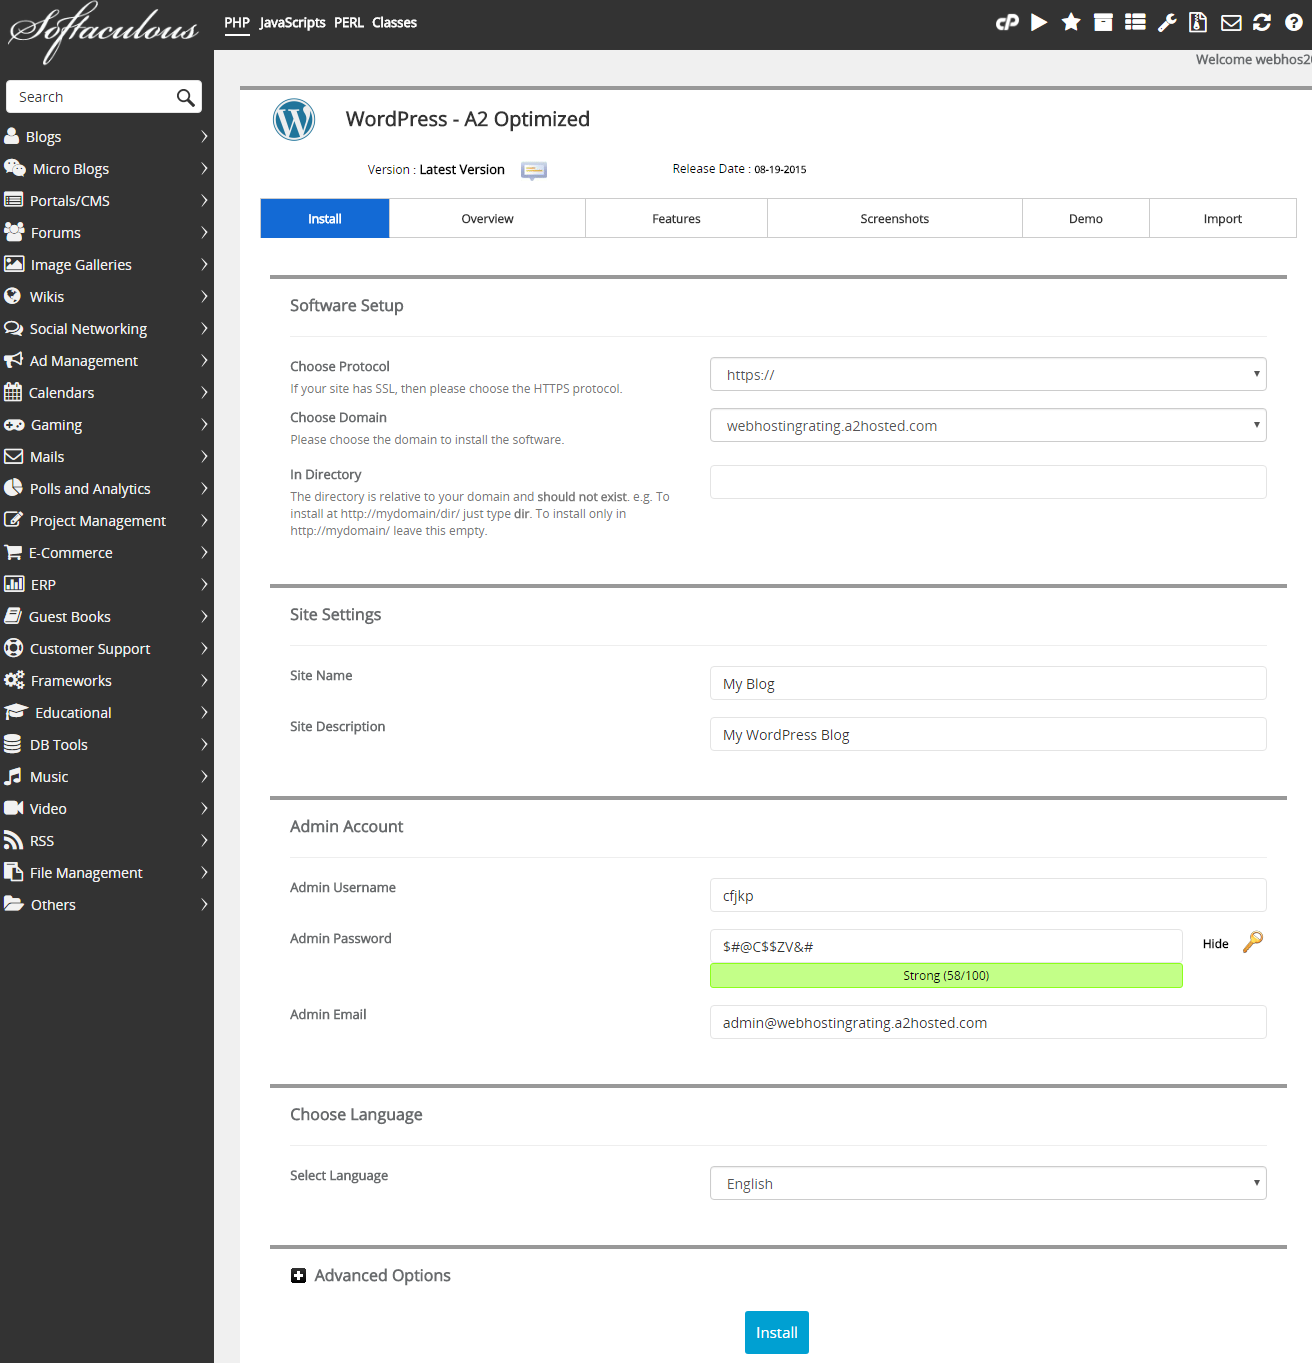
- Step 5. Fill out the installation details (see below) and then click the Install button at the bottom of the page.
- Step 6. Next I walk you through each of the steps on the WordPress installation settings page.
- Choose protocol. Choose which of the provided protocols your WordPress website should be accessible from. For example, I use https://www
- Choose domain. Select the domain name you want to install WordPress on from the drop box
- Install in directory. Leave this blank to install on the domain directly. If you are installing in a subfolder of your site you type in the folder name. For example, if you type in folder-name then WP will be installed: website.com/folder-name.
- Site name. The name of your WordPress site.
- Site description. The description or “tagline” for your WordPress site.
- Admin username. Enter a username for your WordPress Dashboard login.
- Admin password. Enter a password for your WordPress Dashboard login.
- Admin email. Enter an email address for your WordPress Dashboard login.
- Select language. Choose what language you would like your WordPress platform installed in. The list of supported languages is quite big and most probably you will find your native language there
- Advanced options. Here you can rename the database name and table prefix, but you can leave the default values as-is.
- Install. Hit the install button and WordPress will begin installing, once done you will be shown the login details (and emailed too to the above email address you nominated)
That’s everything. Now you know how to sign up with A2 Hosting, and you know how to install WordPress on A2 Hosting. Now it’s up to you to go and create and launch your website, blog, or online store.
For latest prices & deals – visit A2Hosting.com
Use this exclusive A2 Hosting promo code: webrating51 and get 51% off on your first bill

