HostGator is one of the fastest-growing and most popular web hosting providers in the world. In this article, I will take you through the step-by-step process of how to install WordPress on HostGator.
If you’ve already signed up with HostGator then you know that it’s a cheap and beginner-friendly web host which I recommend (read my HostGator review here).
- You get lots of features; like SSD storage, free website migration, free website backups, free CDN, free Let’s Encrypt SSL certificate + more.
- You get a free domain name for one year.
- Lots of storage: All plans come with unlimited storage.
- Flexible terms: Hosting plans can be purchased on a 1, 3, 6, 12, 24, or 36 months basis, paying with a credit card or PayPal AND a 45-day money-back guarantee.
Installing WordPress on HostGator is very VERY straightforward. Here are the exact steps you need to go through to install WordPress on your HostGator hosting plan.
The below first four steps cover how to sign up with HostGator. If you have already done that, then jump straight to the section about installing WordPress here.
Step 1. Go to HostGator.com

Go to their website and scroll down to see the hosting plans page (you can’t miss it).
Step 2. Choose your web hosting plan
HostGator has three web hosting pricing plans you can sign up for; Hatchling, Baby, and Business. I recommend the Hatchling plan (the most beginner-friendly and cheapest!)
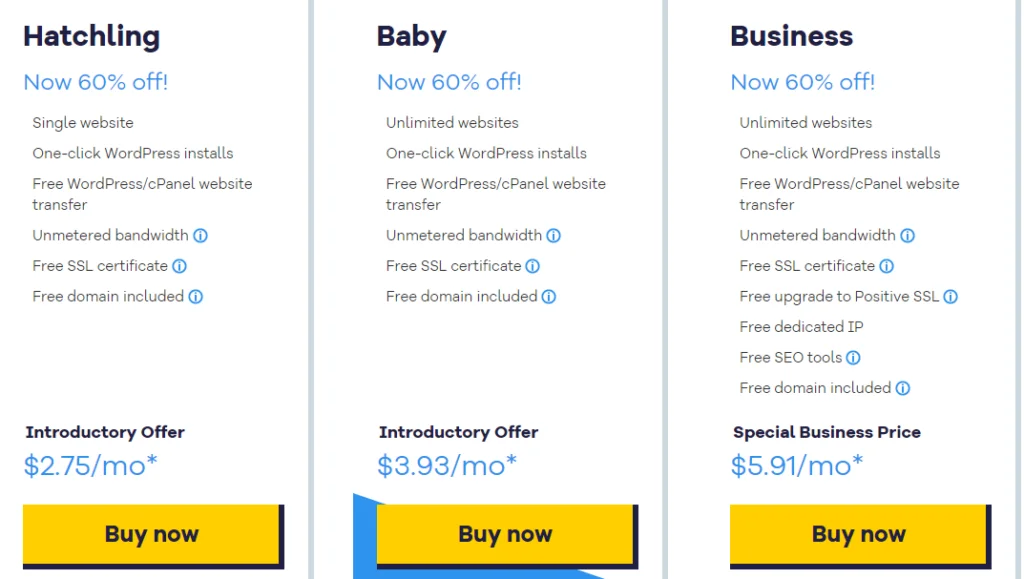
The main difference between the plans are:
- Hatchling plan: host 1 website.
- Baby plan: Everything in Hatchling + host unlimited websites.
- Business plan: Everything in Hatchling & Baby + a free Positive SSL certificate, a dedicated IP address, and included SEO tools.
Get 70% OFF HostGator's plans
From $3.75 per month
Step 3. Choose Domain Name
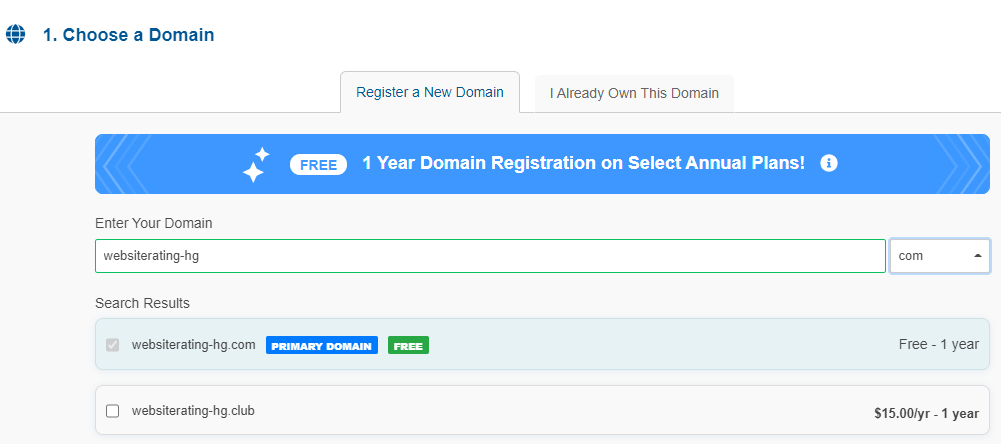
Next, you are asked to choose a domain name.
You can either register a new domain or sign up using an existing domain you own.
Step 4. Sign up with HostGator
Choose your hosting package type and billing cycle.
Next, you are asked to create the login for your HostGator account. Fill out the required fields – email address, password, and Security PIN.
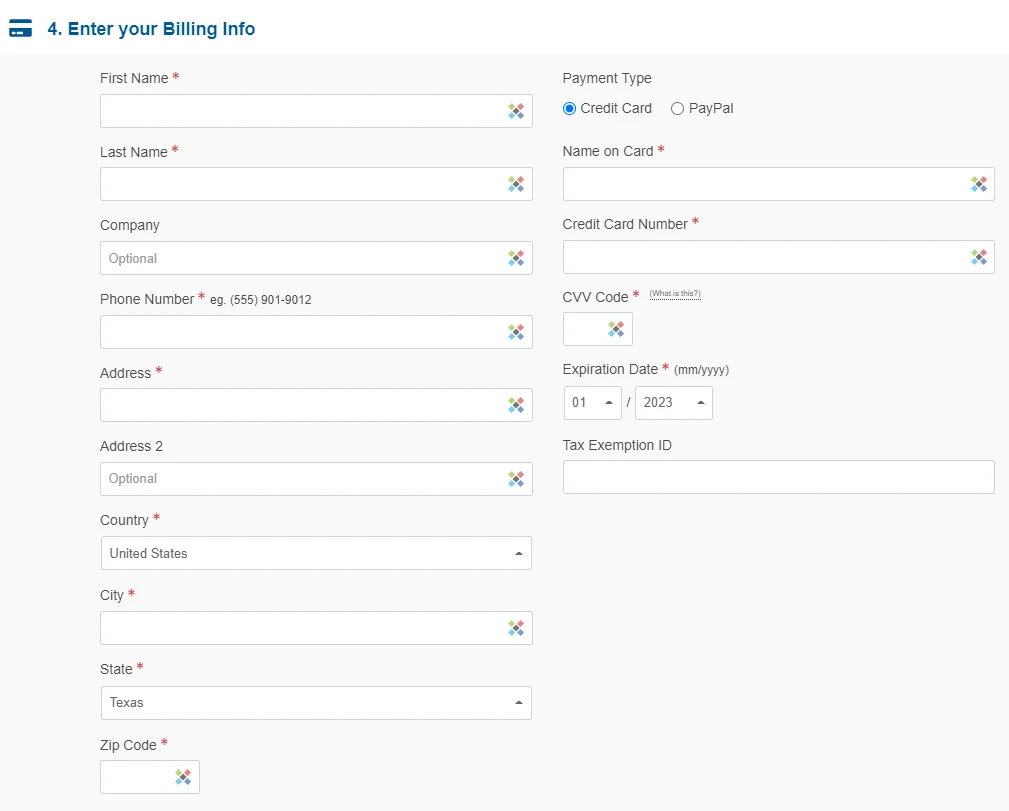
This is is the standard stuff that you have done a million times before; first and last name, address country, phone number, etc. followed by payment information (credit card or PayPal).
Next, go ahead and de-select HostGator’s additional services (you don’t need them).
Then apply a coupon code. You don’t want to miss this to save a lot of money. Make sure that the coupon code WSHR is applied, as it gives you 61% off the total price (saving you up to $170).

Finally, review your order details and check your total amount due.
Congratulations! You have now signed up with HostGator! Next, you’ll receive a welcome email (sent to your signup email address) with your login credentials to your HostGator Customer Portal.
Step 5. Install WordPress
Login to your HostGator dashboard (the link is in your welcome email).
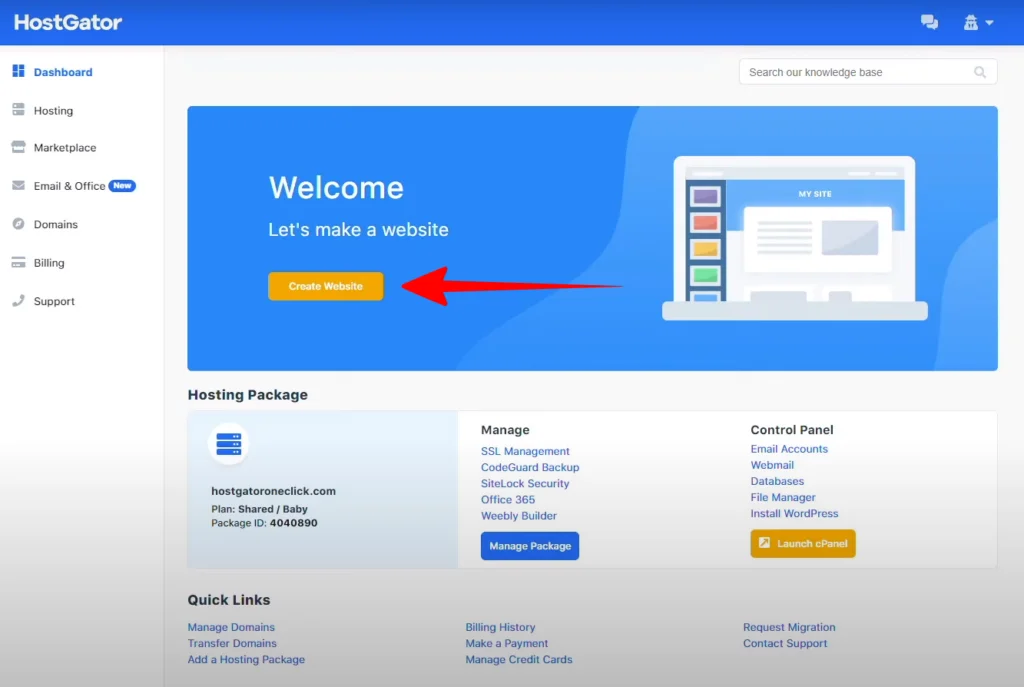
Click on the ‘Create Website’ button. It’s going to take you to a new page where it’s going to install WordPress.
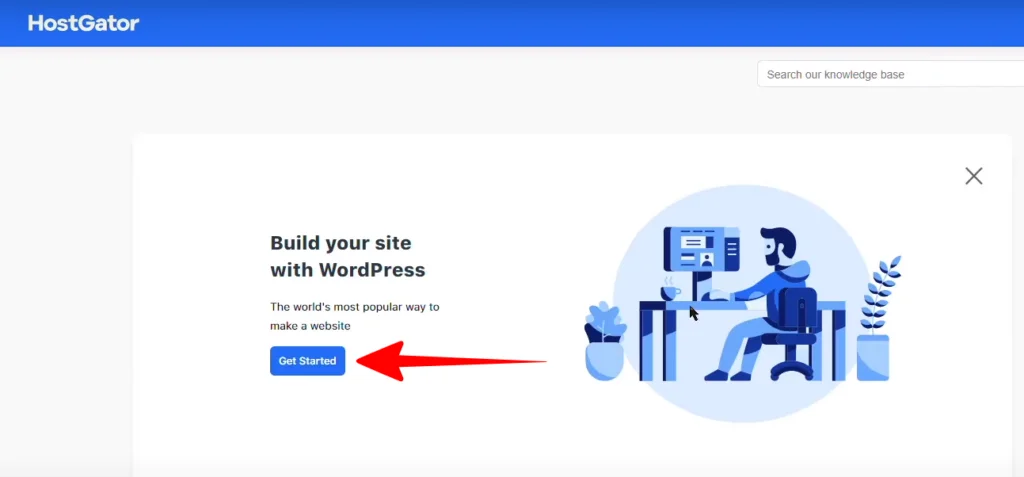
Click the ‘Get Started’ button. In just a matter of seconds, it’s going to go through the entire process of installing WordPress on your HostGator hosting plan.

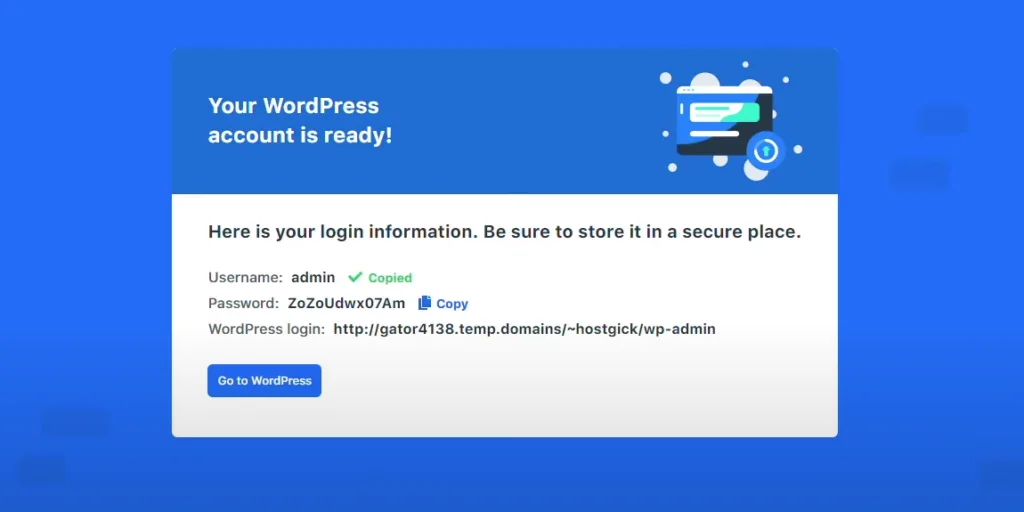
Your WordPress account is now ready, and WordPress is installed. Easy, like I said 🙂
Now, go ahead and copy your username and your password. This is the login for your site.
There is also a login link to your WordPress dashboard. This is your temporary URL (in the next step I will show you how to connect your domain name).
Now, click the ‘Go to WordPress’ button to go to your website.
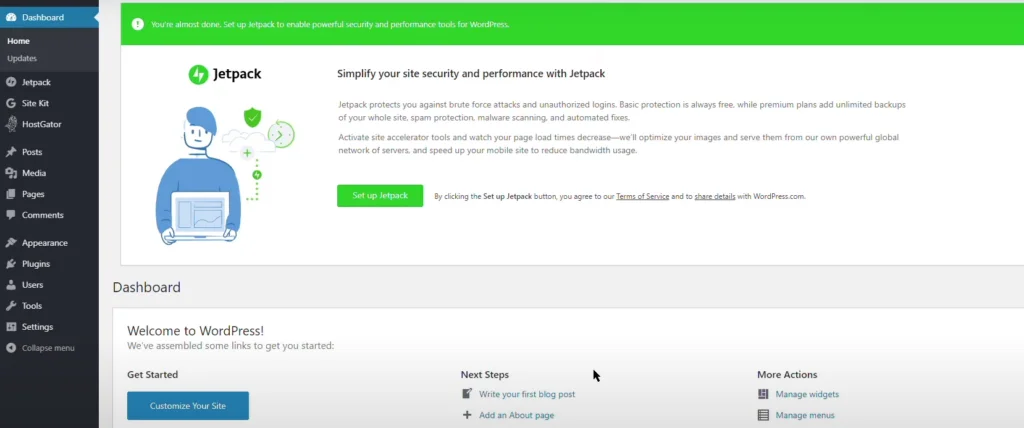
You are now officially, and for the first time, logged into the dashboard of your WordPress site, and now you can start customizing it!
Step 6. Connect Your Domain Name
Next, is to connect your domain name to your newly created website.
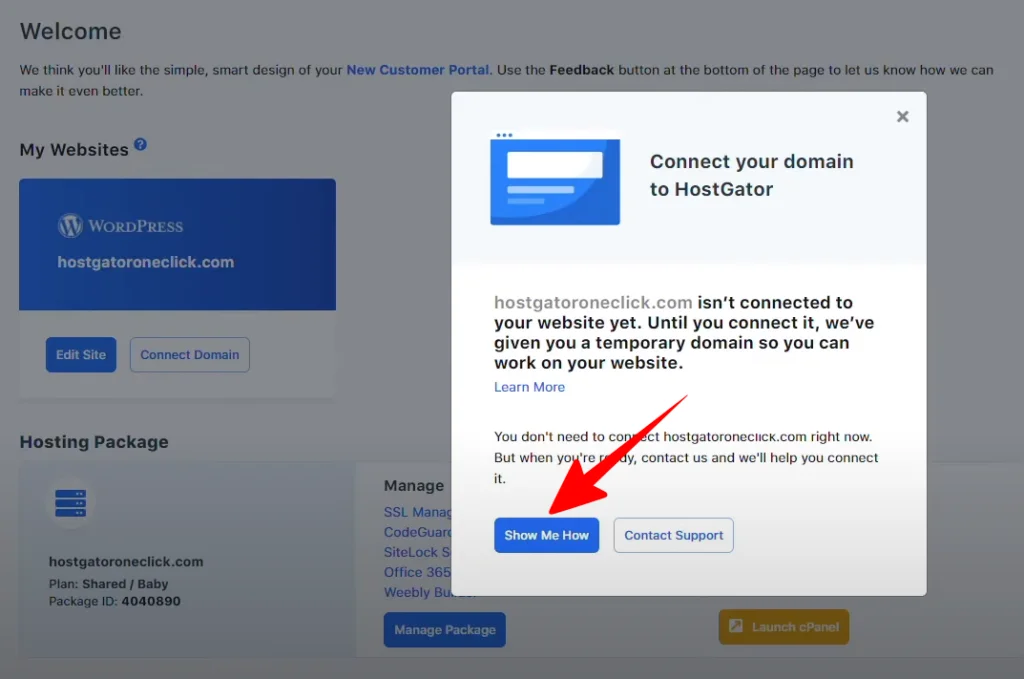
Go back to the HostGator dashboard. In the ‘My Websites’ section, click on the ‘Connect Domain’ button.
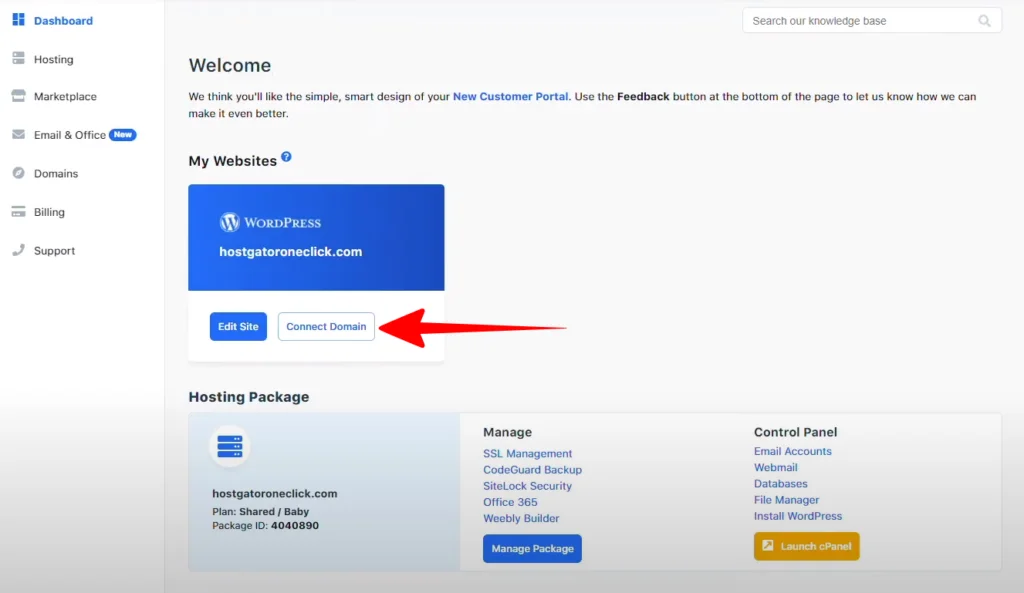
It’s going to tell you that your domain isn’t connected to your website, and until you connect it you are going to be using the temporary URL.
Click on the ‘Show Me How’ button to connect your domain.
Here you are given the exact steps of how to connect your domain name’s name servers to point to your website.
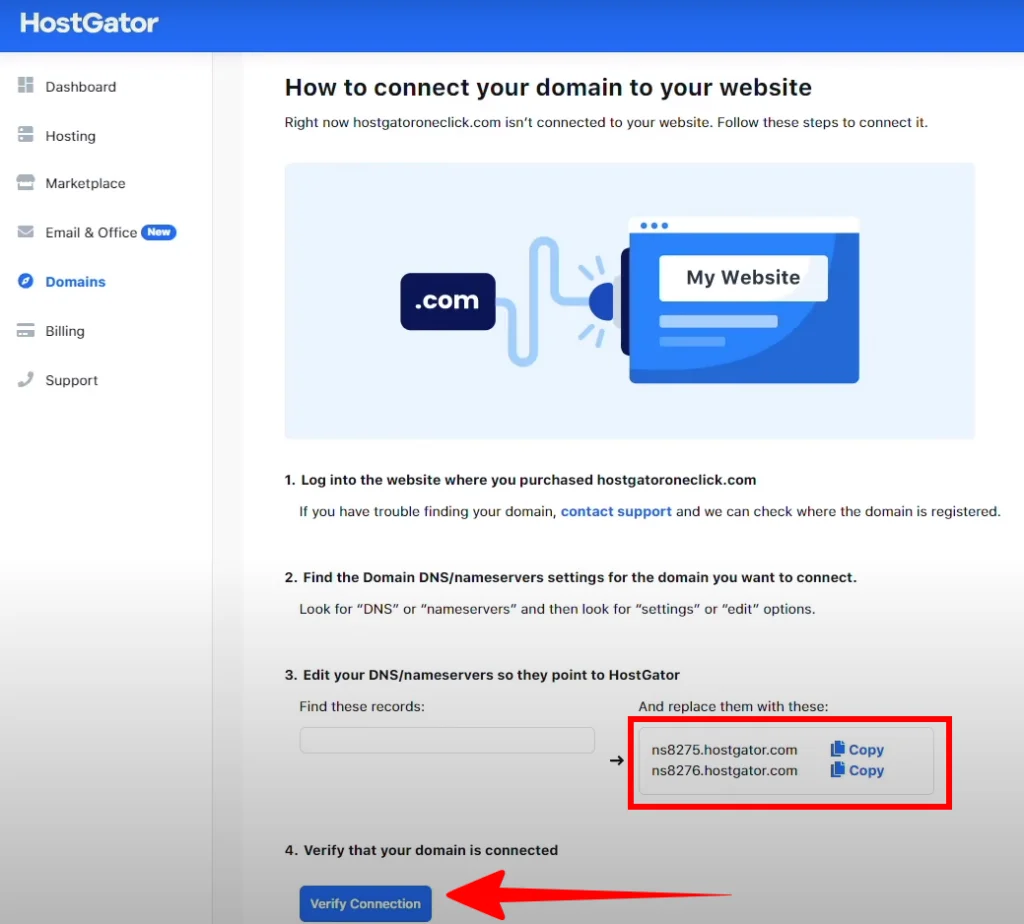
Here’s how to verify your domain name connection:
If you purchased the domain name through HostGator (i.e. HostGator is the registrar)
- HostGator will automatically change that DNS for you when you click the ‘Verify Connection’ button.
- That’s it, you will receive a email in your inbox with a verification link that you’ll need to click to confirm.
If you purchased the domain somewhere else (for example if GoDaddy or Namecheap is the domain name registrar):
- Copy both of the name server records (nsXXX1.hostgator – nsXXX2.hostgator.com)
- Log in to the registrar (for example GoDaddy or Namecheap) and change the DNS name server settings. See this GoDaddy tutorial and this Namecheap tutorial.
- Once done, then come back and click the ‘Verify Connection’ button (allow for up to 24 to 48 hours of the DNS to propagate).
Step 1. All Done!
That’s all there is to it! Congratulations you have now installed WordPress and connected your domain name. Now it’s time to start customizing and building your blog or website.
If you haven’t already, go to HostGator.com and sign up today!
Get 70% OFF HostGator's plans
From $3.75 per month
