
You can configure the following options that are available to configure in your hosting dashboard settings.
Dashboard
In your dashboard you can view your website’s storage space and CPU cores used with basic information such as PHP, WordPress version, or database size.

Note: You can also change your PHP and WordPress version (but make sure you always do a backup beforehand).
You can also use the Edge Caching feature that saves your page cache (which is only stored in your site’s server center) to any of the operated data centers worldwide such as:
Dallas, San Jose, Ashburn, Seattle, Miami, Atlanta, Denver, Chicago, New York (US), Toronto (CA) Singapore, Sao Paolo, (BR), London (UK), Vienna, Sydney (AU), Hong Kong (CHN), Stockholm (SE) Madrid (ESP), Paris (FR), Frankfurt (GER) Johannesburg (SA), Osaka (JP) & Mumbai (IN).
Note: When visitors load your website in their browser, cached replies are provided from the closest location to them.
SFTP & SSH
Here is how you can access your website through SFTP or SSH.

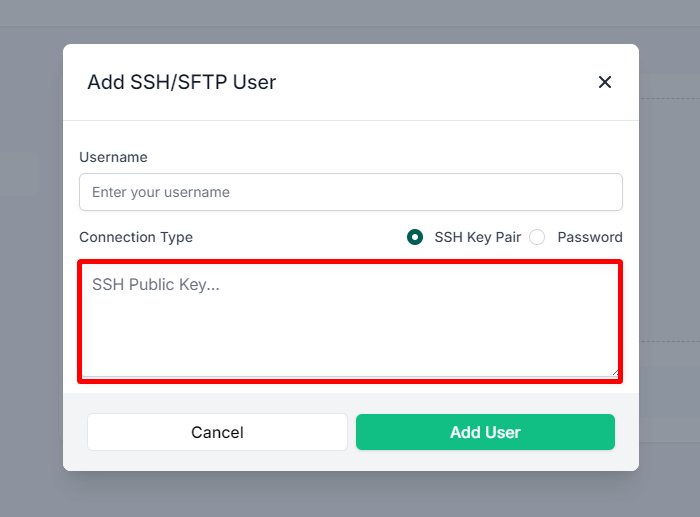
SSH Key Pair
To use an SSH Key pair as a connection type, paste the SSH Public key that you generated on selecting the repository type as private to add a new deployment.
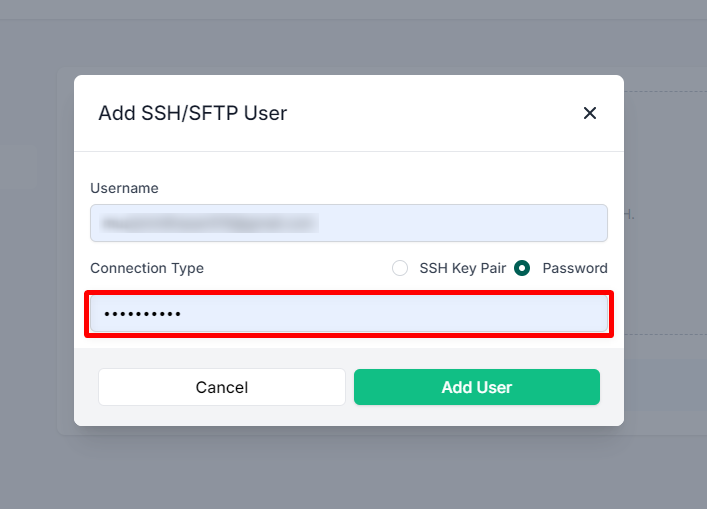
Password
To use a password as a connection type for adding an SSH/SFTP user, enter the password.
After choosing a connection type for adding an SSH/SFTP user, click on the Add User button.
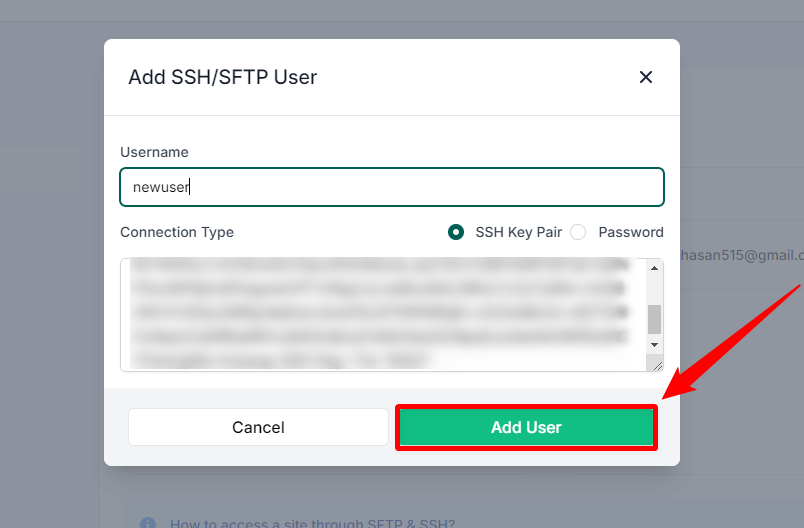
This will add a new SSH/SFTP user which allows you to access the website without any login credentials of the added user.
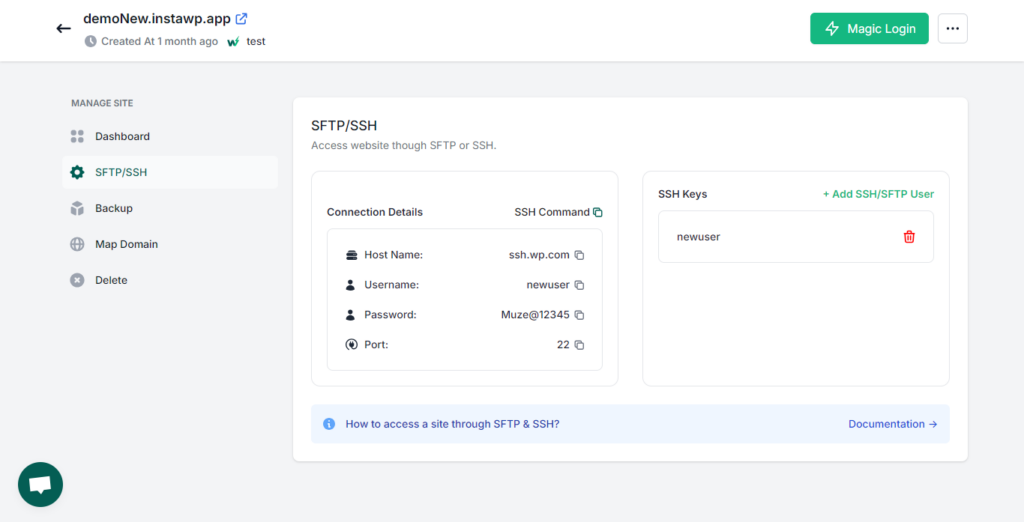
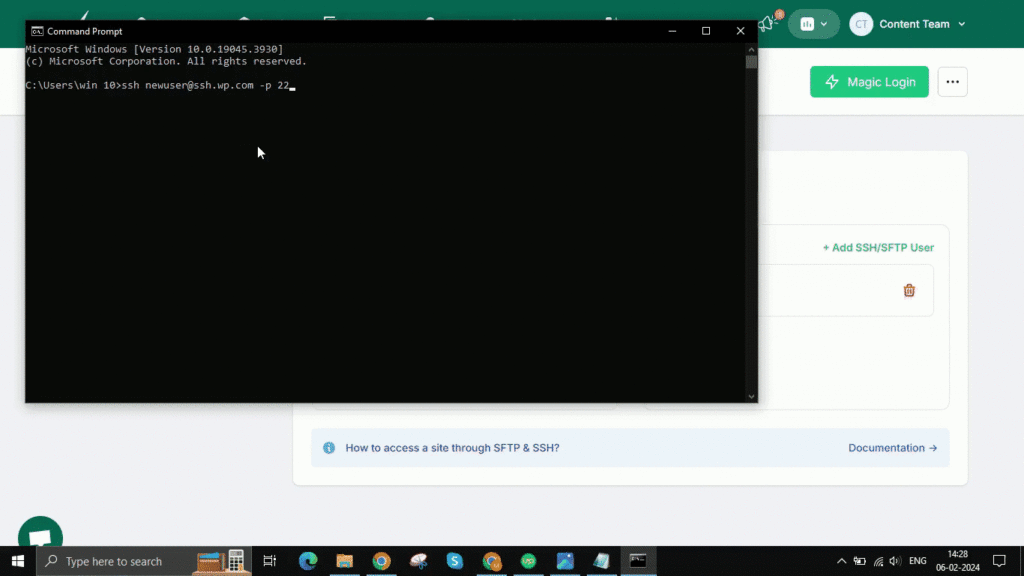
Now that your public key has been connected to your live site, you can copy the SSH command and paste it into your terminal to get a password-less login.
Hit enter and then type yes to execute.
File & Database Backups
You can download the backup file for your site since we automatically create a backup every day and store a separate shadow copy of the site, updated in sync, in another region.
Note: If a primary data center pool encounters an issue, it immediately fails over to the site’s secondary data center pool, keeping the site operational and backup safe.

Note: You can manually backup your files and databases, which will only be created once. To manually generate a backup again, users must first delete the previous one.

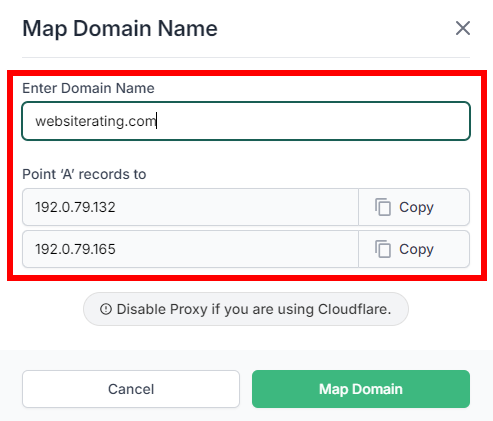
Map Domain Name
You can easily map your site to a custom domain name by linking it to your domain registrar, such as Cloudflare, Namecheap, or GoDaddy.
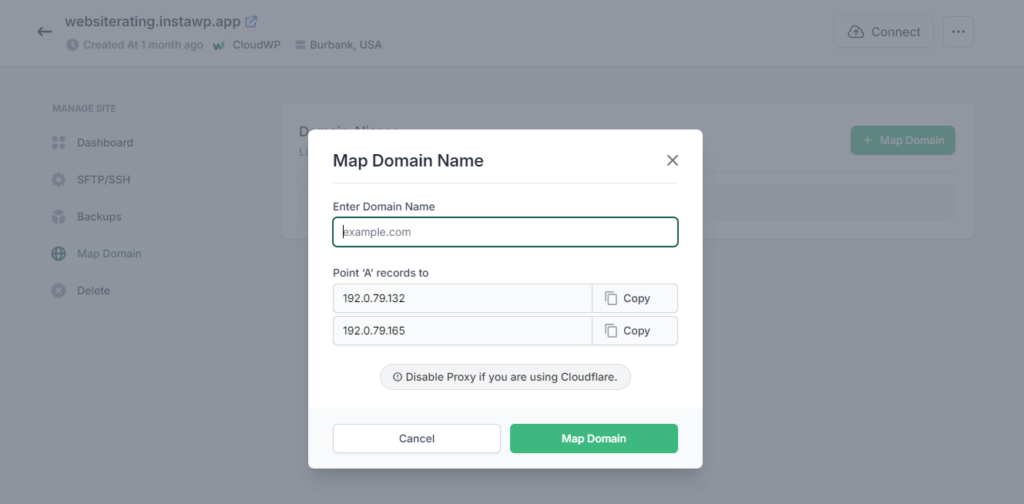
Step 1: Enter a domain name.
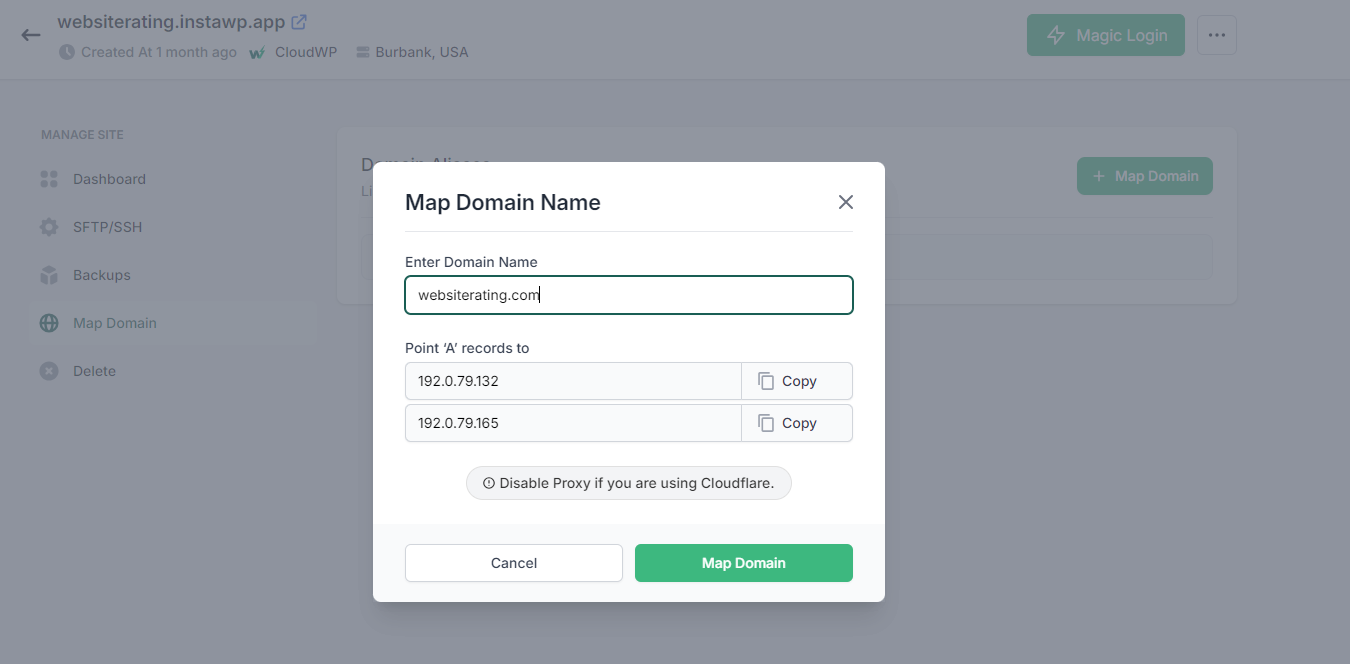
Step 2: Copy the domain name that you have entered and both the “A” records IP addreses, as will be needed to paste on DNS records for mapping.
Step 3: Go to your domain register (such as Cloudflare) to add a new A record.
Log into Cloudflare and navigate to the DNS section of your account.
A Records

You will need two A records for your domain, one for each of the IP addresses provided for your site.
| Type: A Record | Name: (your domain name or @) | Content: 192.0.79.132 |
| Type: A Record | Name: (your domain name or @) | Content: 192.0.79.165 |
CNAME Record
If you want to redirect your domain name to the WWW version, then you will need a CNAME record that directs www to your domain name.
| Type: CNAME Record | Name: www | Content: (your domain name) |
Alternatively, you can add two additional A records for www, using the same IP addresses, instead of a CNAME.
Your DNS records will look similar to the ones below.

You can refer to Cloudflare’s DNS documentation for additional access and configuration information.
Disable Proxying
To ensure your site gets the most out of DDoS protections, WAF, and load balancing, we recommend disabling Cloudflare’s proxy. Note that certain Cloudflare features may rely on their proxy service; however, we highly recommend disabling it.

Note: The proxy should be disabled while adding or editing a DNS record at Cloudflare. Each DNS record entry should have the proxy status set to DNS only.
If your domain is registered with Namecheap, here are the configuration settings to follow.
Step 5: Click on the Map domain button to complete the mapping.

This will complete your domain name mapping. You can refresh the page to see.
File Manager & phpMyAdmin
Here is how you can access the file manager and the database.
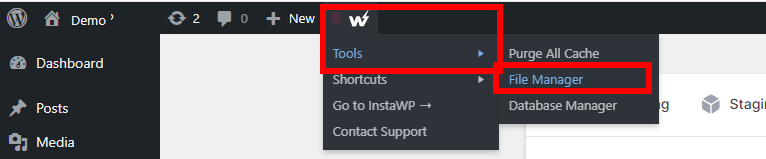
To access the file manager in your WordPress admin dashboard, hover over the top menu and go to Tools –> File Manager
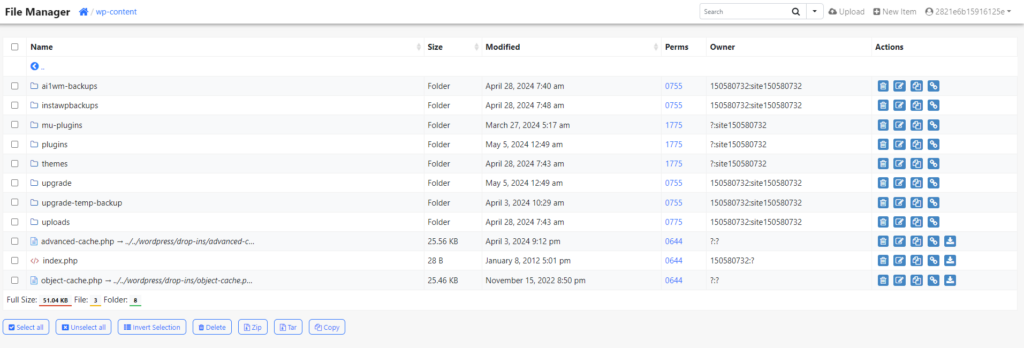
In the File Manager, you can access your site’s directories and files.
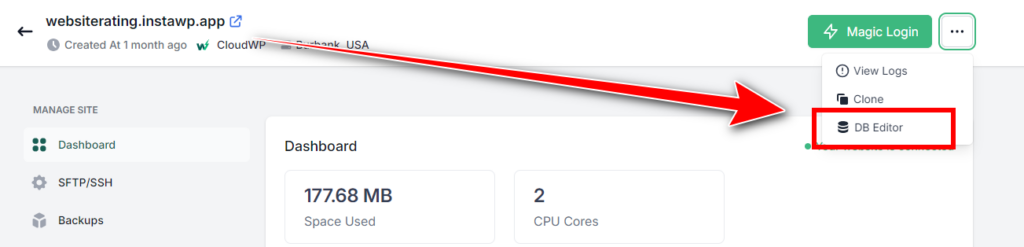
To access your database (phpMyAdmin), go to the dropdown menu and click on the DB Editor link.
Delete Your Site
You can also delete your site if you are no longer needing it.

Note: Make sure you want to do this, as your site will be permanently deleted.