Self-Hosting n8n: Real Costs, Hidden Gotchas, and Which Options Won't Waste Your Time
Table of Contents
n8n Cloud starts at $20/month for their Starter plan. Run a few decent workflows and you’re quickly looking at $50-100/month. Self-hosting can cut that to $5-15/month in server costs. Sounds like a no-brainer, right? Wrong.
Because that $240/year you save comes with a hidden price tag: your time. Setup takes 2-4 hours minimum (unless you really know what you’re doing). Maintenance eats another hour or two per month. And when something breaks at 2am because n8n updated and your webhook authentication stopped working? That’s on you now.
So self-hosting n8n 🤖 can either be a smart financial move or an expensive hobby disguised as cost savings. The difference is knowing which method matches your actual skill level and how much you value your time. Most guides present six “equally viable” options and let you figure it out. This one doesn’t do that, because they’re not equally viable at all.
Should You Even Self-Host n8n?
Before we dive into the “how,” let’s address the real question about the “should you.”
Just pay for n8n Cloud if:
- You value your time at more than $25/hour
- You’re running critical business workflows that can’t afford downtime
- You’ve never SSH’d into a server and don’t particularly want to learn
- Your workflows are simple enough to stay under $50/month on their cloud
Self-hosting makes sense if:
- You’re comfortable with basic server administration (or willing to learn)
- You’re running enough workflows that n8n Cloud costs are adding up
- You actually enjoy tinkering with infrastructure (some of us do)
- You need specific customizations or integrations that the cloud version doesn’t support
- You have genuine data sovereignty requirements (not just paranoia)
The hidden costs nobody mentions:
- Setup time: 2-4 hours for “easy” platforms, 4-8 hours for self-managed solutions
- Ongoing maintenance: 1-2 hours per month minimum
- Your mental energy when things break (and they will)
- The opportunity cost of not building your actual business
If you bill at $100/hour and spend 6 hours on initial setup plus 2 hours monthly maintenance, you’re down $1,800 in the first year. That buys a lot of n8n Cloud subscription. Do the math with your actual numbers before you get excited about saving $15/month.
Still here? Good. Here are six ways to self-host n8n, ranked from “easiest” to “why are you doing this to yourself.”
Comparison: Six Self-Hosting Methods
Full disclosure: Some of these links are affiliate links (specifically Hostinger). I get a commission if you sign up through them. But I’m also going to tell you which options kind of suck, so make of that what you will. The comparison table makes them all look reasonable. They’re not all reasonable.
| Real Monthly Cost | Actual Ease of Use | What “Technical Expertise” Really Means | Who This Is Actually For | |
|---|---|---|---|---|
| Render | $7-15 (free tier is useless for production) | Easiest by far | Can you click buttons? You’re qualified | Testing workflows or very light production use |
| Hostinger VPS | $7.99-9.99 (KVM2 at $9.99 recommended) | Actually easier than raw VPS - decent control panel | Some VPS knowledge helpful but not required | Best value for control - easier than DigitalOcean, more powerful than Render |
| Railway | $8-25 (that $5 credit disappears fast) | Easy until something breaks | Comfortable with git, basic debugging | Developers who already use Railway for other projects |
| DigitalOcean | $12-24 (the $5 droplet won’t cut it) | Medium - one-click install hides complexity | You need to know what SSH is and not be scared of it | Anyone with basic Linux skills who wants control |
| Heroku | $7-50+ (they killed the free tier) | Easy but expensive fast | Can follow a tutorial but 2FA setup is mandatory | People stuck in the Heroku ecosystem already |
| Local Docker | Free-ish (electricity + your time) | Hard mode engaged | You’ve run docker commands before and didn’t panic | Privacy nerds, tinkerers, and people who enjoy self-inflicted complexity |
1. Render (The Quickest Solution)
Render is legitimately the easiest way to get n8n running if you’ve never self-hosted anything before. Click a few buttons, paste in a Docker image, and you’re done. Render is stupidly simple, which is both its strength and weakness.
The free tier trap: Yes, Render has a free tier. No, you absolutely cannot use it for production. It spins down after 15 minutes of inactivity, which means your scheduled workflows will fail when the service is asleep. Plus it takes 30-60 seconds to wake up, so any webhook-triggered workflows will timeout. The free tier is for testing only - treat it that way.
What you actually need: The $7/month Starter plan is what you actually need. It’s still cheaper than n8n Cloud, stays awake 24/7, and handles light-to-moderate workflow usage. Once you’re running dozens of workflows or have heavy data processing, you’ll need the $15 Pro plan. At that point, do the math on whether n8n Cloud starts making more sense.
Steps to Deploy N8N on Render:
Initial Setup
-
Navigate to render.com and click “Sign Up”
-
Enter your email address and create a secure password
-
Verify your email through the confirmation link
-
Log into your new Render account
Deployment Steps
-
From the Render dashboard:
-
Click “New +” button
-
Select “Web Service”
-
Choose “Deploy an existing image”
-
-
Docker Configuration:
-
In the Image URL field, enter:
docker.io/n8nio/n8n -
Name your service (e.g., “my-n8n-instance”)
-
Select your region (choose closest to your location)
-
-
Plan Selection:
-
Choose your plan:
-
Free: Good for testing (auto-spins down after inactivity)
-
Starter ($7/month): Good for light production use
-
Pro ($15/month): For heavy usage
-
-
Note: Free tier will sleep after 15 minutes of inactivity
-
-
Environment Variables (Optional but Recommended):
-
Click “Advanced”
-
Add these key variables: N8N_BASIC_AUTH_ACTIVE=true N8N_BASIC_AUTH_USER=your-username N8N_BASIC_AUTH_PASSWORD=your-password N8N_ENCRYPTION_KEY=your-secret-key
-
-
Final Deployment:
-
Click “Create Web Service”
-
Wait for deployment (usually 2-5 minutes)
-
Access your instance via the provided .onrender.com URL
-
First-Time Setup
-
Access your N8N instance through the provided URL
-
Create your admin account:
-
Enter email address
-
Create secure password
-
Confirm password
-
-
Complete onboarding:
-
Select your role/industry
-
Choose organization size
-
Indicate how you heard about N8N
-
My actual recommendation: Start with the Starter plan ($7/month). It’s the sweet spot for most people - cheap enough to be worth it over n8n Cloud, reliable enough for real workflows. If you outgrow it, you can always migrate to something else (or just pay for n8n Cloud and stop managing infrastructure yourself).
Important consideration: Render doesn’t include a database by default. n8n will use SQLite which is fine for light usage, but if you’re serious about this, you’ll want to connect to an external Postgres database. That’s another $7-15/month on top, which suddenly makes this less of a bargain.
2. Hostinger (Best Value VPS)
Hostinger is actually a solid middle-ground option. They provide a VPS with an n8n template that genuinely simplifies setup, and their control panel is legitimately more user-friendly than raw SSH. Hostinger’s n8n template gets you up and running faster than DigitalOcean while still giving you real VPS control.
Full disclosure on the affiliate link: That Hostinger link above is an affiliate link. I make money if you sign up. Why am I telling you this? Because I’m going to tell you what you’re actually getting, which is more than most affiliate-driven “reviews” will do.
The pricing reality: Hostinger’s VPS actually starts at $7.99/month for their KVM1 plan (not the inflated “$12-30” I see in other guides). For n8n, the KVM2 plan at $9.99/month is the sweet spot - enough resources to run comfortably without overpaying. That’s monthly pricing, not some bait-and-switch multi-year commitment. Compared to DigitalOcean’s $12+ or Railway’s $15-25 reality, Hostinger is genuinely competitive.
Steps to Host N8N on Hostinger:
Account Setup
-
Create Hostinger Account:
-
Click “Hosting”
-
Select VPS Hosting
-
Choose plan (minimum 4GB RAM recommended)
-
Complete purchase process
-
Initial Configuration:
-
Log into Hostinger control panel
-
Navigate to VPS section
-
Select “Deploy New Server”
-
N8N Installation
-
Server Setup:
-
Choose operating system (Ubuntu recommended)
-
Select N8N from one-click installations
-
Choose server location
-
Set root password
-
Configure hostname
-
-
DNS Configuration:
-
Add new domain or use provided subdomain
-
Configure A record:
-
Host: n8n or @
-
Points to: Your VPS IP
-
TTL: 3600
-
-
-
Security Setup:
-
Configure firewall:
-
Allow ports 80, 443, 5678
-
Enable SSH (port 22)
-
-
Set up SSL certificate:
-
Use Auto SSL or
-
Install Let’s Encrypt manually
-
-
Final Configuration
-
Access Server:
-
Use provided control panel
-
Navigate to N8N installation
-
Complete initial setup:
-
Create admin account
-
Configure timezone
-
Set up email settings
-
-
-
Monitoring Setup:
-
Enable server monitoring
-
Configure backup schedule
-
Set up email notifications
-
-
Maintenance:
-
Regular updates through control panel
-
Monitor resource usage
-
Configure automatic backups
-
What you actually get: The control panel genuinely helps if you’re not comfortable living in SSH. One-click n8n installation that actually works (unlike some marketplace images that are outdated). Decent support if you get stuck. And importantly, the pricing is transparent - $9.99/month means $9.99/month, not “starts at $5 but you’ll actually pay $20.”
What to expect: Hostinger will get you set up and provide tools that make management easier, but you’re still responsible for your n8n instance. They’ll help with server issues, but don’t expect them to debug your workflows. It’s “managed VPS” not “managed n8n” - there’s a difference.
Who this actually makes sense for: You want more control than Render but don’t want to learn raw VPS management from scratch. You like having a GUI control panel instead of doing everything via SSH. You want good value without complicated billing. You’re comfortable with some technical responsibility but appreciate having guardrails.
Who should skip it: Complete beginners who’ve never touched a server (just use Render). People who want actual fully-managed services (that’s n8n Cloud). Anyone who’s already comfortable with DigitalOcean or AWS and doesn’t need the simplified interface.
3. Railway (GitHub-Based Solution)
Railway is what happens when developers build a hosting platform for other developers. It’s slick, it integrates with GitHub beautifully, and it makes you feel smart when you use it. Railway also has a pricing model that looks great until you actually use it.
The $5 credit illusion: Railway gives you $5 of free credit per month. Sounds generous, right? A Postgres database alone will eat $3-4 of that. Add n8n running 24/7 and you’re at $8-10/month minimum. The marketing says “$5 to start” but the reality is “starts at $5, you’ll actually pay $15-25 depending on usage.” Still not terrible, but be honest about the real cost.
The GitHub integration is actually great: If you’re already committing your n8n workflows to git (you should be), Railway’s auto-deploy from GitHub is genuinely useful. Push to main, it deploys automatically. That’s slick. The problem is when you push a breaking change at 5pm on Friday and your workflows all die.
Steps to Deploy N8N on Railway:
Prerequisites
- Create a GitHub account if you don’t have one:
-
Go to github.com
-
Click “Sign up”
-
Follow the registration process
-
Verify your email
-
Railway Setup
-
Go to railway.app
-
Click “Start a New Project”
-
Select “Deploy from GitHub template”
-
Search for “n8n” in templates
-
Click “Deploy Now”
Configuration Steps
-
Project Settings:
-
Name your project
-
Choose deployment region
-
Select GitHub repository for deployment
-
-
Environment Configuration:
- Set required variables: N8N_HOST=your-railway-url N8N_PROTOCOL=https N8N_PORT=5678 DATABASE_TYPE=postgresdb
-
Database Setup:
-
Click “Add Plugin”
-
Select “PostgreSQL”
-
Railway automatically configures database connection
-
-
Final Steps:
-
Wait for initial deployment
-
Access your instance through the provided Railway URL
-
Complete N8N setup wizard
-
Who should use Railway: Developers who are already comfortable with Git and want infrastructure that feels modern. Also good if you’re running multiple services and want them all in one place with easy cross-service networking. The built-in Postgres is convenient, even if it costs extra.
Who should skip Railway: Non-technical users (Render is easier), or anyone trying to minimize costs (you’ll pay a premium for the slick developer experience).
4. DigitalOcean (Enterprise-Grade Solution)
DigitalOcean is the “actual VPS” option on this list. You get a real server (they call them Droplets, because branding), you SSH into it, you’re responsible for it. DigitalOcean has a one-click marketplace installer for n8n, but don’t let that fool you into thinking this is beginner-friendly.
The $5 droplet lie: Every DigitalOcean tutorial says “starts at $5/month!” and they’re technically correct, which is the best kind of wrong. That $5 droplet has 1GB of RAM. n8n will run on it the same way you can “run” in flip-flops - technically possible, inadvisable. You want the $12-18/month droplet minimum (2-4GB RAM) for anything beyond toy workflows.
The marketplace install is hit or miss: The DigitalOcean marketplace has an n8n one-click install. Sometimes it works great. Sometimes the image is six months out of date and you need to immediately update everything. Sometimes the SSL certificate setup script fails and you’re googling “certbot nginx digitalocean” at 11pm. It’s still easier than setting up from scratch, but “one-click” is doing some heavy lifting here.
Steps to Deploy N8N on DigitalOcean:
Account Setup
-
Go to digitalocean.com
-
Click “Sign Up”
-
Enter email and create password
-
Add payment method (required)
-
Verify email address
Droplet Creation
-
From Dashboard:
-
Click “Create” button
-
Select “Droplets”
-
Choose “Marketplace”
-
Search for “N8N”
-
-
Configure Droplet:
-
Choose plan (Basic recommended for start)
-
Select CPU options ($5-10/month sufficient for testing)
-
Choose datacenter region (closest to you)
-
Select additional options:
-
Enable backups (recommended)
-
Add SSH keys (if familiar with SSH)
-
-
-
Authentication:
-
Create root password (save securely)
-
Choose hostname (e.g., “n8n-production”)
-
-
DNS Configuration:
-
Go to Networking > Domains
-
Add your domain if you have one
-
Create A record:
-
Host: n8n
-
Points to: Your droplet IP
-
TTL: 3600
-
-
Post-Installation
-
Access your droplet console
-
Follow the automated setup script
-
Configure SSL with Let’s Encrypt
-
Access N8N through your domain
Why you’d actually choose DigitalOcean: You want real control. You need to install custom dependencies or modify system settings. You’re comfortable SSHing into a server and don’t panic when you see a terminal. You already use DO for other projects and want everything in one place. Or you’re running enough workflows that even the $18/month feels worth it for the performance.
Why you’d skip it: You’ve never touched Linux. The words “SSH key” make you nervous. You don’t want to think about security updates or server maintenance. If that’s you, just use Render and sleep better at night.
Surprise costs: Backups are extra ($2-4/month but you absolutely want them). Bandwidth overages can hit if you’re processing a ton of data. Monitoring tools cost extra if you want to know when your server’s about to die. Factor all this in.
5. Heroku (Developer-Friendly Solution)
Heroku used to be the go-to recommendation for easy deployment. Then Salesforce bought them, killed the free tier, and jacked up prices. Heroku is still around, it’s still easy to use, but the value proposition got a lot murkier.
The free tier is dead, long live the eco dyno: Heroku killed their free tier in late 2022. The cheapest option now is the $7/month Eco dyno, which - surprise - sleeps after inactivity just like Render’s free tier used to. You need the $7 Basic dyno if you want 24/7 uptime. Add a Postgres database (another $5-9/month minimum) and you’re at $12-16/month for the basics.
At this price point, why Heroku? Good question. If you’re already deep in the Heroku ecosystem with other apps, fine, keep everything in one place. If you’re starting fresh, Render or Railway will give you the same ease-of-use for less money. Heroku’s brand recognition doesn’t justify the price premium anymore.
Steps to Deploy N8N on Heroku:
Initial Setup
-
Create Heroku Account:
-
Go to heroku.com
-
Click “Sign Up”
-
Enter:
-
Email address
-
Company name (optional)
-
Preferred language/region
-
Password (must be 8+ characters)
-
-
Verify email address
-
-
Two-Factor Authentication Setup:
-
Download Google Authenticator or similar app
-
Scan QR code provided by Heroku
-
Enter verification code
-
Save backup codes securely
-
Deployment Process
-
Access N8N GitHub Repository:
-
Go to github.com/n8n-io/n8n
-
Look for “Deploy to Heroku” button
-
Click the button
-
-
Configure App Settings:
-
App name: Choose unique name (e.g., “my-n8n-instance”)
-
Region: Select closest to your location
-
Configure environment variables: N8N_ENCRYPTION_KEY=your-secure-key N8N_PORT=5678 NODE_ENV=production WEBHOOK_URL=https://your-app-name.herokuapp.com
-
-
Resource Configuration:
-
Select dyno type (Eco or Basic)
-
Add PostgreSQL add-on:
-
Go to Resources tab
-
Search for “Heroku Postgres”
-
Select plan tier
-
Provision database
-
-
-
Final Configuration:
-
Wait for deployment completion
-
Click “View App”
-
Complete N8N setup wizard
-
The mandatory 2FA thing: Heroku now requires 2FA for all accounts. This is good for security, annoying for setup. Nothing says “developer-friendly” like mandatory 2FA on a service you’re going to forget the password to six months from now. Keep those backup codes somewhere safe.
My honest take: Unless you’re already paying for Heroku apps and want to consolidate, skip this. The pricing doesn’t make sense for new n8n deployments. Render is easier and cheaper. Railway is hipper and about the same price. DigitalOcean gives you more control for similar money. Heroku is coasting on its 2010s reputation at this point.
6. Docker (Local Installation)
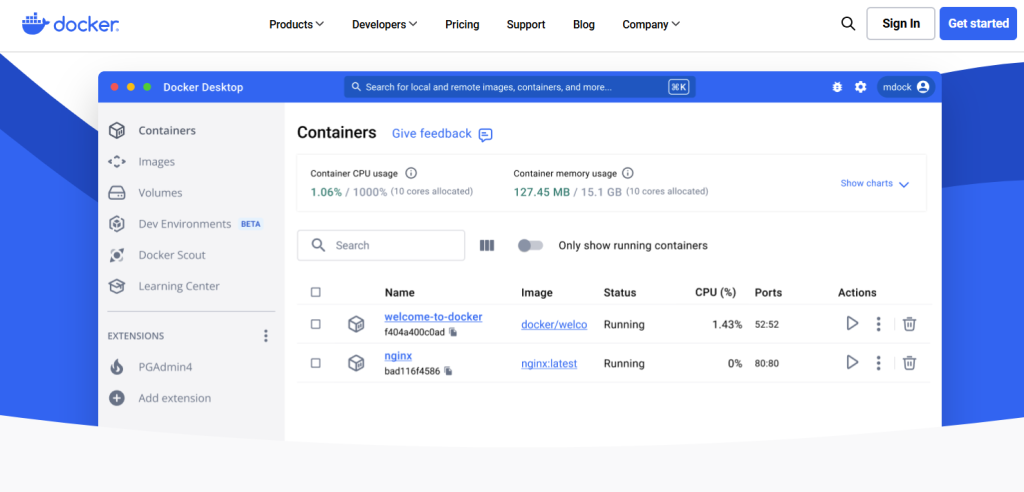
Running n8n locally with Docker is for people who either: (a) have genuine data sovereignty requirements, (b) really enjoy self-hosting things, or (c) want to learn Docker and picked n8n as their practice project. If you’re not in one of these categories, you’re making your life unnecessarily hard.
“Free” is relative: Yes, there’s no monthly hosting fee. But you’re running this on hardware you own (or rent). That’s electricity costs, wear on your machine, and the fact that when your internet goes down or your power flickers, your workflows stop. You also need to handle your own backups, updates, monitoring, and all the fun stuff that cloud providers do for you.
Docker networking will make you cry: The Docker run command is simple enough. Getting HTTPS working with proper certificates? That’s where people tap out. You’ll need to either expose your home IP (bad idea), set up a reverse proxy like Caddy or nginx (more complexity), or use a service like Cloudflare Tunnel (which defeats half the privacy argument). This is doable, but it’s not “easy.”
Steps to Deploy N8N Locally with Docker:
Docker Installation
-
Download Docker Desktop:
-
Select version for your OS:
-
Windows: Download .exe
-
Mac Intel: Download .dmg
-
Mac M1/M2: Download Apple Silicon version
-
Linux: Follow distribution-specific instructions
-
-
Install Docker Desktop:
-
Windows:
-
Run installer
-
Enable WSL 2 if prompted
-
Restart computer
-
-
Mac:
-
Open .dmg file
-
Drag Docker to Applications
-
Open Docker from Applications
-
Grant necessary permissions
-
-
N8N Container Setup
- Pull N8N Image
docker pull n8nio/n8n- Create Docker Volume:
docker volume create n8n_data- Run N8N Container:
docker run -d \
 --name n8n \
 -p 5678:5678 \
 -v n8n_data:/home/node/.n8n \
 -e N8N_BASIC_AUTH_ACTIVE=true \
 -e N8N_BASIC_AUTH_USER=your-username \
 -e N8N_BASIC_AUTH_PASSWORD=your-password \
n8nio/n8n- Additional Configuration:
- Access container shell:
docker exec -it n8n /bin/bash-
Modify configuration files if needed
-
Set up persistent storage
Access and Management
-
Access N8N:
-
Open browser
-
Navigate to localhost:5678
-
Complete initial setup
-
-
Container Management:
-
Stop container:
docker stop n8n -
Start container:
docker start n8n -
View logs:
docker logs n8n -
Update image:
-
docker pull n8nio/n8n
docker stop n8n
docker rm n8n
# Re-run container with updated image
The backup problem nobody talks about: With cloud hosting, backups are someone else’s problem. With Docker at home, they’re your problem. Docker volumes are persistent, but if your hard drive dies, your workflows are gone. You need a real backup strategy - not “I’ll get to it eventually” but actual scheduled backups to somewhere off that machine.
Who should actually do this: You’re a tinkerer who enjoys infrastructure as a hobby. You have actual compliance requirements that prevent cloud hosting. You’re already running a home server and n8n is just one more service. You understand the tradeoffs and accept them.
Who should absolutely not do this: Anyone running critical business workflows who isn’t prepared for the 2am “the container won’t start” panic. Anyone who doesn’t have a solid backup strategy. Anyone who expects this to “just work” without ongoing maintenance. Just pay for Render, seriously.
Important Considerations Before Self-Hosting n8n
Before you commit to any of these options, here are the critical details that most tutorials skip:
Webhooks and HTTPS Are Non-Negotiable
If you’re using webhooks (and you probably are), you need HTTPS with a valid certificate. That means:
- You can’t just use
http://localhost:5678 - Self-signed certificates will fail with most webhook senders
- You need a domain name or use the provided subdomain from your host
- SSL setup fails more often than documentation suggests
Every platform handles this differently. Render and Railway give you HTTPS automatically. DigitalOcean and Hostinger make you set up Let’s Encrypt yourself (which works until it doesn’t). Docker at home requires a reverse proxy or tunnel service.
Monitoring Is Your Responsibility Now
With n8n Cloud, they tell you when things break. With self-hosting, you find out when a client emails asking why their workflow didn’t run three days ago.
You need monitoring:
- Uptime monitoring (UptimeRobot, Healthchecks.io)
- Error logging (n8n has this built-in, but you need to actually check it)
- Resource monitoring (so you know when you’re about to run out of RAM)
Nobody does this on day one. Everyone wishes they had after their first incident.
Updates Can Break Things
n8n updates regularly. Usually it’s fine. Sometimes an update breaks a node you depend on. With n8n Cloud, that’s their problem and they’ll roll back. With self-hosting, you’re the one troubleshooting at 11pm because you auto-updated and your workflows died.
The smart approach: Don’t auto-update production. Test updates in a staging environment first. (Nobody actually does this for a personal n8n instance, but you should know you’re supposed to.)
Database Migrations Are Where Things Get Spicy
If you start with SQLite (the default) and later need Postgres (for better performance), migration is painful. If you start with Render and want to move to DigitalOcean later, you’re exporting and importing. None of this is impossible, but it’s all friction you don’t have with a managed service.
Backup Testing Is Not Optional
Everyone sets up backups. Nobody tests restores until they desperately need one. Test your restore process while everything is working. You’ll sleep better.
The Real Cost Breakdown
Let’s be honest about what this actually costs, including your time:
Render (Starter Plan):
- Hosting: $7/month
- Setup time: 1 hour ($100 if you bill at $100/hr)
- Monthly maintenance: 30 minutes ($50/month)
- First-year total: $684 + yearly maintenance $600 = $1,284
DigitalOcean VPS:
- Hosting: $12-18/month (let’s say $15 average)
- Backups: $3/month
- Setup time: 3-4 hours ($350 @ $100/hr)
- Monthly maintenance: 1-2 hours ($150/month)
- First-year total: $566 + yearly maintenance $1,800 = $2,366
n8n Cloud (for comparison):
- Starter plan: $20/month
- Setup time: 15 minutes ($25)
- Monthly maintenance: 0 hours (their problem)
- First-year total: $265
See the problem? Unless you value your time at minimum wage, self-hosting is often more expensive than n8n Cloud once you factor in your hourly rate.
When self-hosting makes financial sense:
- You value your time at under $25/hour
- You’d hit the $50+ tiers on n8n Cloud anyway
- Setup and maintenance are legitimately a learning opportunity you value
- You’re already managing infrastructure and this is just one more thing
Just Tell Me Which One to Use
You made it this far, so here’s the actual advice without the fluff:
If you’re new to self-hosting and want easy: Render, Starter plan ($7/month). It’s the lowest friction option that actually works for production. Free tier is for testing only.
If you’re a developer who likes modern tools: Railway. The GitHub integration is genuinely useful and worth the slight price premium. Budget $15-20/month realistically.
If you want real control and know your way around Linux: DigitalOcean. Get the $12-18/month droplet, not the $5 one. Enable backups. Accept that you’re now a sysadmin.
If you’re already paying for Heroku: Fine, add n8n there for convenience. Otherwise skip it - Heroku is overpriced for what you get.
If you want to learn Docker or have compliance requirements: Go local. But know what you’re signing up for. This is not the “easy way to save money” - it’s a project.
If you want the best value for VPS control: Hostinger at $9.99/month (KVM2 plan). Easier than DigitalOcean’s raw VPS experience, more control than Render, and honest pricing. It’s actually a sweet spot option.
If none of this sounds appealing: Just pay for n8n Cloud. Seriously. The Starter plan is $20/month, it works, and it’s someone else’s problem when things break. That’s worth $240/year for most people.
The Real Question Isn’t “Can I Self-Host?” It’s “Should I?”
You can absolutely self-host n8n. The question is whether the juice is worth the squeeze.
If you’re staring at a $50+/month n8n Cloud bill and you know your way around a server, self-hosting makes sense. If you’re trying to “save money” by avoiding their $20/month starter plan, do the math on what your time is worth first. Most people discover they’ve spent $500 of their time to save $13/month.
The best self-hosting setup is the one you’ll actually maintain. Render for simplicity, Hostinger for value, DigitalOcean for control. All of them work. None of them work if you set it up and forget about monitoring, backups, and updates.
And if you get six months in and realize self-hosting was a mistake? n8n Cloud is still there. There’s no prize for suffering through infrastructure management you hate.